Search
Close this search box.
Search
Close this search box.

Administration Interface

The HyperVisu Administration Interface provides centralized control over your server configuration, network settings, and system management.

Authentication #

First Login #

When accessing the HyperVisu server for the first time:

  • Type your server’s IP address in a web browser (default: 192.168.1.60)
  • On the landing page, click the Administration button
  • Use the default login credentials:
    • Username: admin
    • Password: admin1

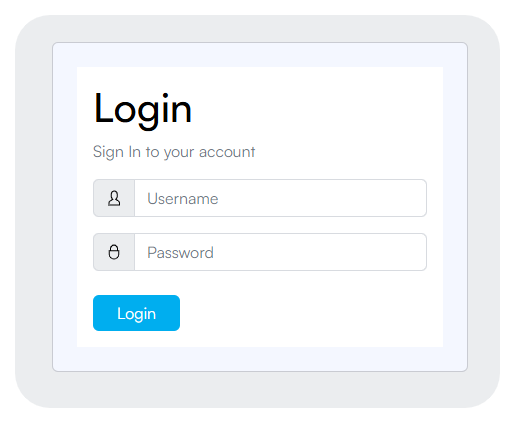
Important Security Note: The default account will be overwritten once you establish a connection between ElauPro and the HyperVisu server and update the user list.


User Credentials Management #

After connecting your ElauPro project to the HyperVisu server, the user accounts defined in ElauPro will be downloaded to the server, replacing the default admin account. This ensures that:

  • Individual user accounts have personalized access permissions
  • Each user logs in with their own credentials
  • Permission levels and access rights defined in ElauPro are enforced in HyperVisu

Profile Management #

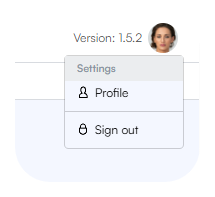
To manage your profile:

  • Click on the profile image in the upper right corner of the administration interface
  • A dropdown menu appears with the following options:
    • Profile: Access your profile settings
    • Sign out: Log out of the administration interface
 

Server Configuration #

The Server Configuration section shows the status of various server components and provides essential information for connecting to external systems.

KNX Connection Status #

The KNX Connection section displays:

  • Gateway: The IP address of the KNX gateway
  • Protocol: The communication protocol in use (example: TunnelUDP)
  • Status: The current connection status (Connected/Disconnected)

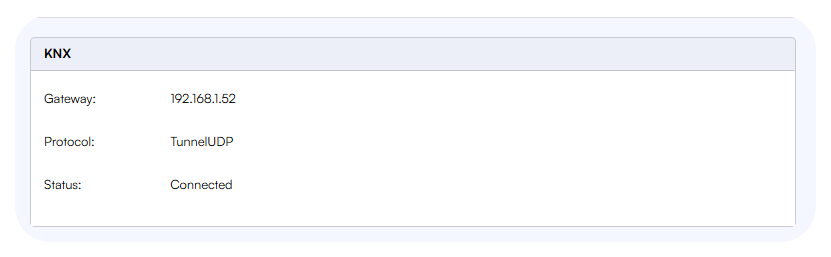
This information is crucial for verifying that your HyperVisu server is properly communicating with the KNX bus. If the status shows “Disconnected,” check your network settings and ensure that the KNX gateway is online and properly configured.


Remote Access Settings #

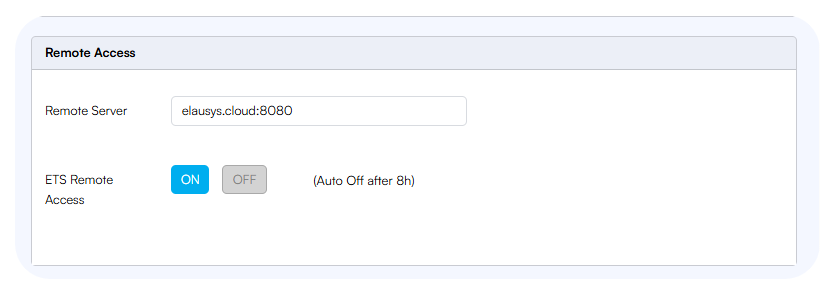
The Remote Access section allows you to configure how the HyperVisu server connects to the Elausys cloud service:

  • Remote Server: The address of the Elausys cloud server (typically elausys.cloud:8080)
  • ETS Remote Access: Toggle button to enable/disable remote ETS access


When ETS Remote Access is enabled:

  • Remote connection to the KNX bus through the Elausys cloud server becomes possible
  • The system displays the IP address (Elausys.cloud) and port number to use in ETS
  • This feature will automatically deactivate after 8 hours for security reasons
  • You can manually disable it at any time


Note: Remote access allows you to program KNX devices via ETS software without being physically present at the installation location.

System Information (Serial Number and Token) #

The System section contains critical identification information for your HyperVisu server:

  • Server SN: The unique serial number of your server
  • Server Token: Security token for authorization

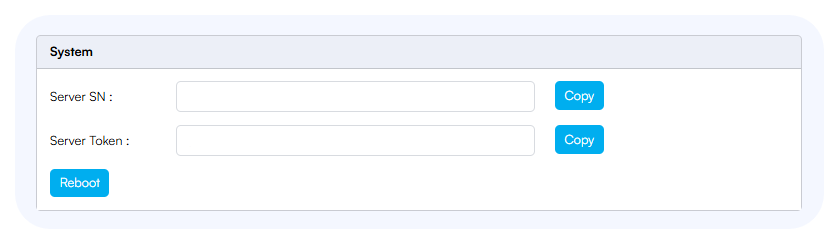
These two elements are essential for registering your server in ElauPro:

  • In ElauPro, navigate to the Visualization section, Server tab
  • Edit the server serial number linked to your project
  • Copy the serial number from the administration page to ElauPro
  • Copy the token from the administration page to ElauPro
  • Click Save to establish the connection
  • The status will change to “online” in ElauPro, indicating the server is connected to the internet and associated with your project


Note:  Use the “Copy” buttons next to each field rather than manually typing these values.


The server section also includes a Reboot button to restart the HyperVisu server if needed. 


Server Updates #

The Update section shows:

  • Last Update: Date and time of the most recent server software update
  • Update button: Initiates the server update process when a new version is available


To update your HyperVisu server:

  • Make sure your server has a working internet connection
  • Click the Update button
  • The server will check for available updates from the Elausys update server
  • If an update is found, it will be downloaded and installed automatically
  • Wait for the process to complete – do not power off or disconnect the server during the update
  • The server will reboot after the update is complete


Note: It’s recommended to regularly check for updates to ensure your server has the latest features and security improvements.

Network Settings #

The Network Settings section allows you to configure how your HyperVisu server connects to your local network.

DHCP vs. Static IP Configuration #

The HyperVisu server supports two methods for IP address assignment:

  • DHCP: Automatically obtains network settings from your router or DHCP server
  • Static IP: Manually configured network settings

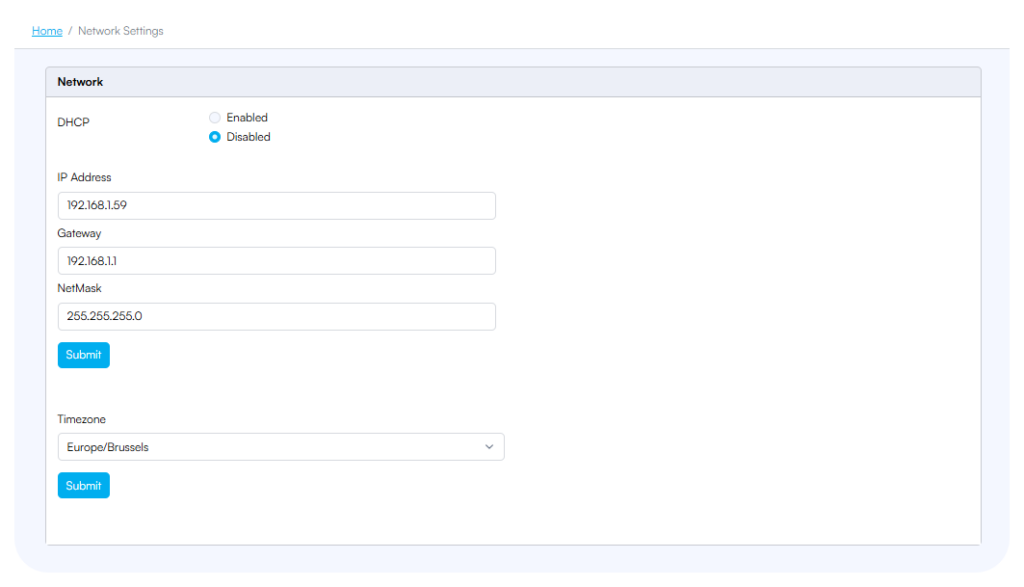
To configure your network settings:

  • Navigate to the Network Settings page by clicking on “Network Settings” in the left sidebar menu
  • Choose between DHCP and Static IP configuration:
    • Select “Enabled” under DHCP to use automatic configuration
    • Select “Disabled” under DHCP to manually configure a static IP


For Static IP configuration (recommended for server installations), enter the following information:

  • IP Address: The fixed address for your HyperVisu server (example: 192.168.1.59)
  • Gateway: Your network’s gateway/router address (example: 192.168.1.1)
  • NetMask: The subnet mask for your network (example: 255.255.255.0)
  • Click the “Submit” button to apply your network configuration changes


Important Note: After changing network settings, especially the IP address, your connection to the administration interface will be lost. You will need to reconnect using the new IP address you configured.


Timezone Configuration #

Setting the correct timezone ensures that all scheduled operations, logs, and timestamps reflect your local time:

  • Scroll down to the Timezone section on the Network Settings page
  • Click the dropdown menu to select your timezone (example: Europe/Brussels)
  • Click the “Submit” button to apply your timezone setting

Import/Export Configuration #

The Import/Export section provides tools for backing up your HyperVisu configuration and transferring configuration data manually between ElauPro and the HyperVisu server.

Exporting Configuration Tables #

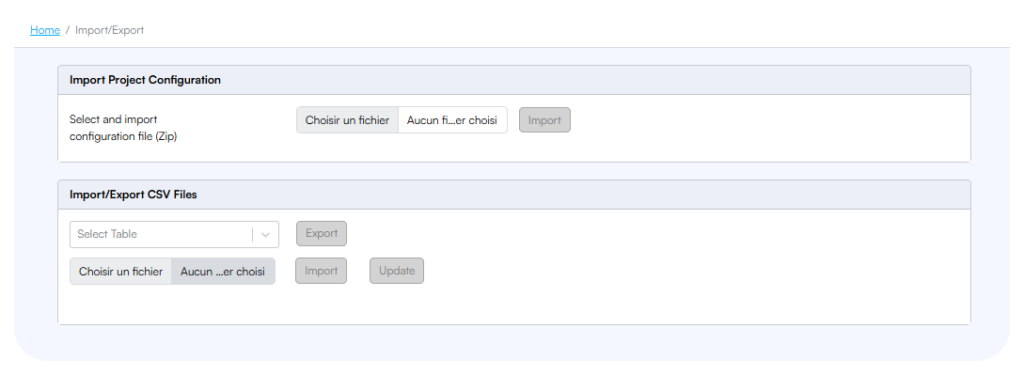
To export individual configuration tables:

  • Navigate to the Import/Export page by clicking “Import/Export” in the left sidebar menu
  • In the “Import/Export CSV Files” section, use the dropdown menu to select the configuration table you want to export
  • Click the “Export” button
  • The selected table will be downloaded to your computer as a CSV file


Exporting configuration tables is useful for:

  • Creating backups of specific configuration components
  • Modifying configuration data outside the HyperVisu interface
  • Transferring specific configuration elements to another installation


Importing Configuration Files #

To import individual configuration files:

  • In the “Import/Export CSV Files” section, use the dropdown menu to select the configuration table you want to import
  • In the “Import/Export CSV Files” section, click “Choose a file”
  • Select the CSV configuration file you want to import
  • Click the “Import” button to upload the file
  • After importing all necessary configuration files, click the “Update” button to apply the changes


Important: The update step is crucial as it processes the imported data and applies it to the running server configuration. Without clicking “Update,” your imported configurations will not take effect.


Using ZIP Imports from ElauPro #

ElauPro can generate a complete configuration package for your HyperVisu server. To import this package:

  • In the “Import Project Configuration” section at the top of the Import/Export page, click “Choisir un fichier” (Choose a file)
  • Select the ZIP file exported from ElauPro
  • Click the “Import” button


This method is especially useful when:

  • Your HyperVisu server doesn’t have a direct internet connection to ElauPro
  • You need to restore a server configuration


The ZIP file from ElauPro contains all necessary configuration files including:

  • User accounts and permissions
  • Room and category definitions
  • Widget configurations
  • Protocol settings
  • Visualization parameters
 

InfluxDB Settings #

InfluxDB is a time-series database used by HyperVisu to store historical data from your smart home system. This data is used for trending graphs and analytics.


The InfluxDB Settings page displays the connection parameters for the embedded InfluxDB database:

  • Host: The database server address (typically localhost for the embedded database)
  • Port: The connection port (typically 8086)
  • Username: Database authentication username
  • Password: Database authentication password
  • Database: The name of the database where HyperVisu stores time-series data


In most cases, these settings do not need modification as they are pre-configured for the embedded database that comes with your HyperVisu server. However, advanced users might adjust these settings to connect to an external InfluxDB instance for larger installations.


Note: Modifying these settings incorrectly can prevent historical data recording. Only change these settings if you have experience with InfluxDB database administration.

Node-RED Access #

Node-RED is a powerful flow-based programming tool that comes integrated with your HyperVisu server. It allows you to create custom automation logic, integrate with external systems, and extend the capabilities of your smart home system.


To access Node-RED:

  • Click on “Node-RED” in the left sidebar menu
  • A new browser tab will open with the Node-RED login page
  • Use the same username and password as for the HyperVisu administration interface


Once logged in to Node-RED, you can:

  • Create automation flows using the intuitive drag-and-drop interface
  • Connect to IoT devices and external services
  • Implement custom logic for your smart home system
  • Use the HyperVisu widgets library to interact with your KNX devices


Node-RED includes specific nodes for HyperVisu that correspond to each widget type in your visualization. These nodes allow you to:

  • Receive status updates from your KNX devices
  • Send commands to control your home automation system
  • Create complex conditional logic and scheduling
  • Process data from sensors and other inputs
  • Generate notifications based on system events


Detailed information about using Node-RED with HyperVisu is available in a separate document that focuses specifically on creating automation flows and integrating with external systems.

What are your feelings