Establishing Connection #
The HyperVisu server and ElauPro must be properly connected to enable seamless project management and configuration transfer. This connection allows you to design your project in ElauPro and then deploy it directly to your HyperVisu server.
Serial Number and Token Registration #
To establish a connection between ElauPro and your HyperVisu server, you need to register the server’s unique serial number and security token in ElauPro:
- Locate your server information:
- Access the HyperVisu administration page by entering your server’s IP address in a web browser
- Navigate to the “System” section
- Locate the “Server SN” (Serial Number) and “Server Token” fields
- Use the “Copy” buttons next to each field to copy these values to your clipboard

- Enter the information in ElauPro:
- In ElauPro, open your project
- Navigate to the “Visualization” section
- Select the “Server” tab
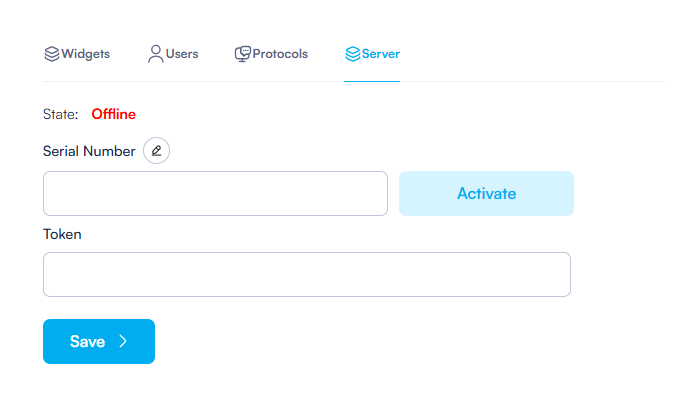
- Click the edit icon next to the “Serial Number” field
- Paste the serial number copied from the HyperVisu administration page
- Paste the token in the “Token” field
- Click “Save” to register the information

This process creates a secure link between your ElauPro project and the specific HyperVisu server. The serial number and token act as authentication credentials, ensuring that your project configurations can only be downloaded to the authorized server.
Online Status Configuration #
After registering the serial number and token, ElauPro will attempt to establish a connection with the HyperVisu server:
- Connection status verification:
- The “State” indicator in ElauPro will show the current connection status
- “Offline” (red) indicates no connection has been established
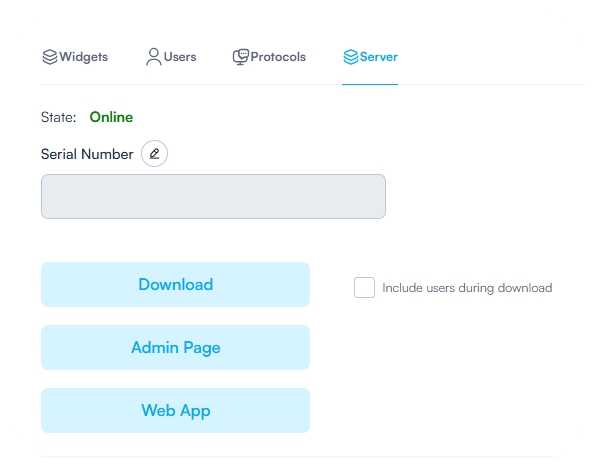
- “Online” (green) indicates a successful connection
- Troubleshooting connection issues:
- Ensure the HyperVisu server is powered on and connected to the network
- Verify that the server has internet access (required for cloud connection)
- Check that the serial number and token were entered correctly

When the status changes to “Online,” your ElauPro project is successfully connected to your HyperVisu server, and you can proceed with configuration transfers.
Downloading Project Configuration #
Once your ElauPro project is connected to the HyperVisu server, you can download your configuration:
- Prepare your configuration:
- Complete your project design in ElauPro, including:
- Building structure (rooms, zones)
- Device configurations
- User accounts
- Widget settings
- Visualization preferences
- Initiate the download:
- In ElauPro, navigate to the “Visualization” section
- Select the “Server” tab
- Ensure the connection status shows “Online”
- Click the “Download” button
- Optionally check “Include users during download” if you want to transfer user accounts
- Note: This will overwrite existing users on the server
- Wait for the confirmation message indicating a successful download
- Verify the configuration:
- Once the download is complete, your HyperVisu server will automatically apply the new configuration
- You can access the HyperVisu web application by clicking the “Web App” button in ElauPro
- Alternatively, connect using the mobile application to verify your configuration
The download process transfers all necessary configuration data from your ElauPro project to the HyperVisu server, including rooms, devices, widgets, users, and visualization settings.