Function setup
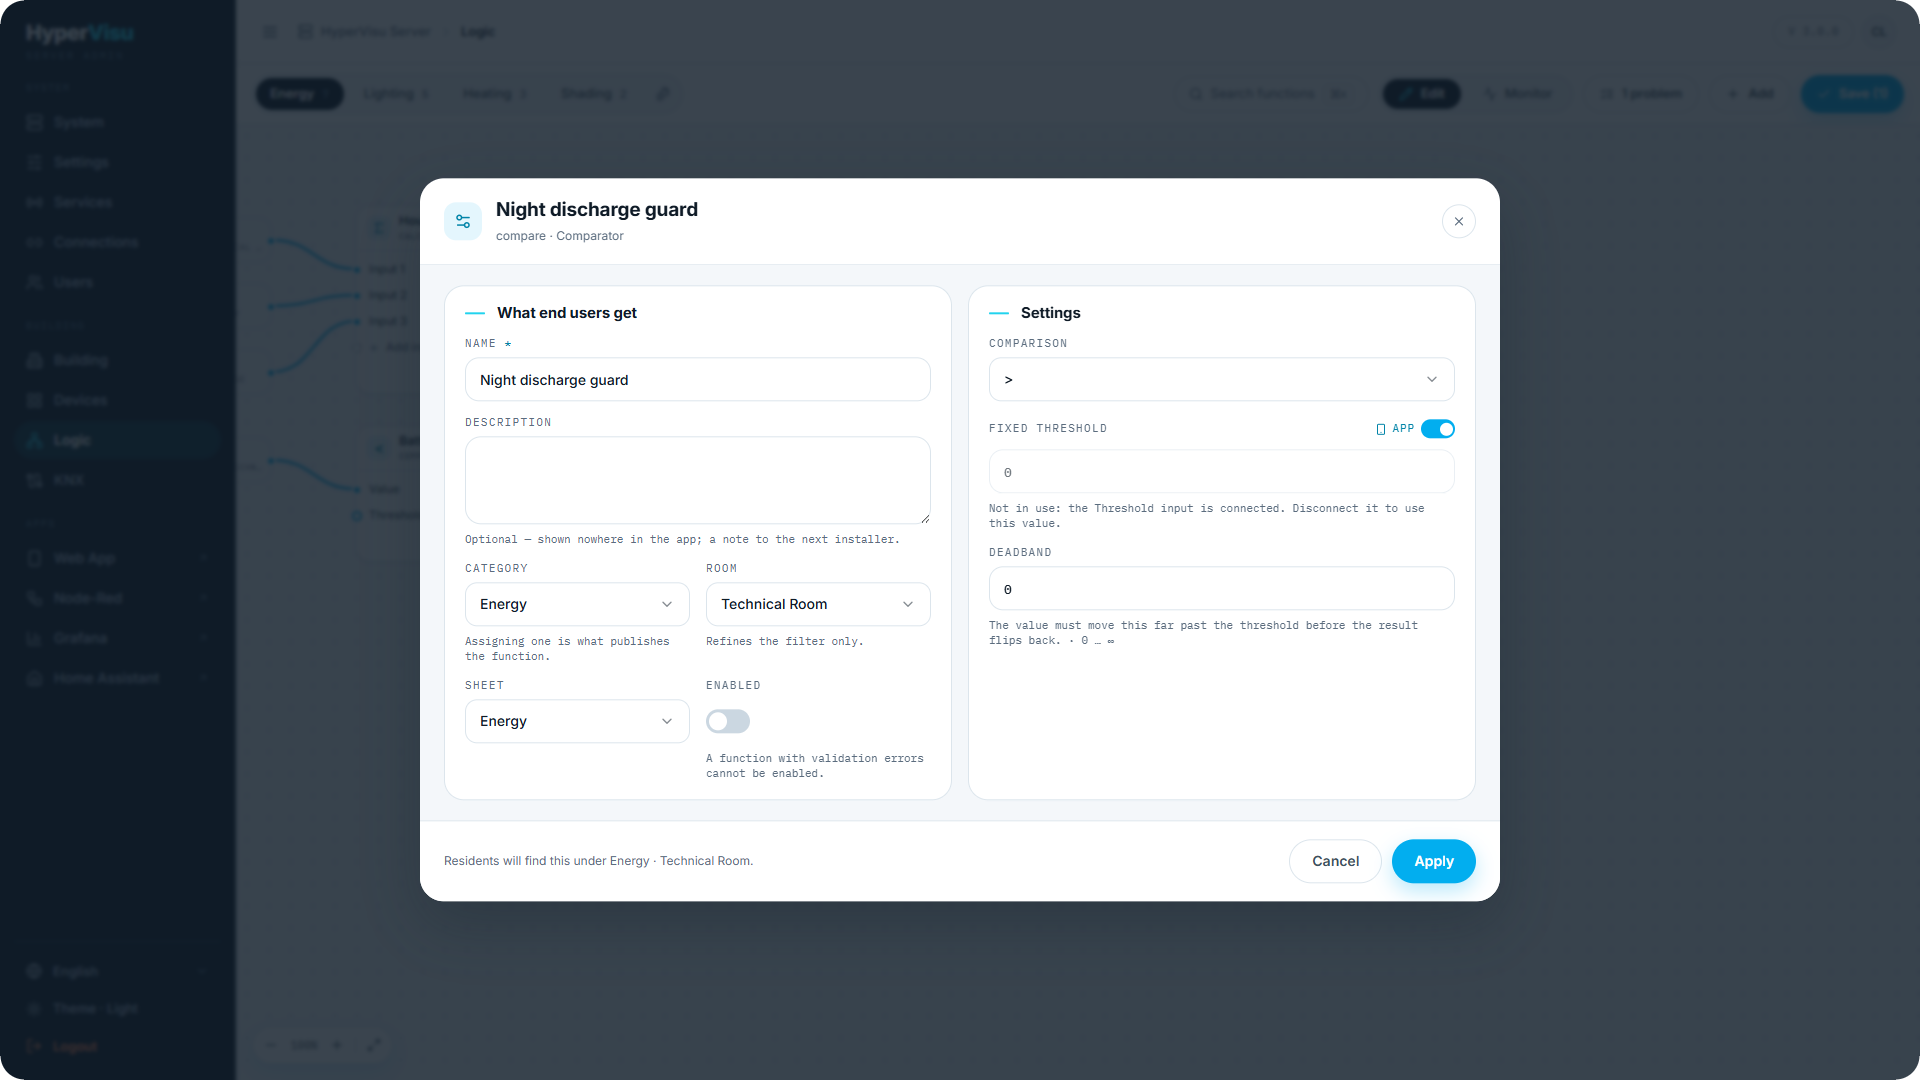
Double-click a function card (or use its menu) to open its setup dialog:
- Name and description — name functions for the resident who will read them in the app ("Living room heating", not "Thermostat 3").
- Enabled — a disabled function keeps its wiring but does not run.
- Sheet — where it is filed.
- Category and room — a function with a category becomes visible in the apps (see “Functions in the App”); the room places it. Leave the category empty for helper functions residents should not see.
- Icon — shown in the app.
- Settings — the block's typed settings, with ranges, steps, units and conditional visibility (settings irrelevant to the current choices are hidden). A setting that is superseded by a bound input port is shown disabled — the wire wins.
- Per-setting exposure — eligible settings carry an App toggle: switched on, residents can change that setting from the function's page in the app; switched off, it stays admin-only. Expose the comfort choices (setpoints, thresholds); keep the safety ones (wind position, protection limits) to yourself.
Outputs
Click an output port to configure where its value goes. The output dialog has three tabs — Devices, Actions and Make a widget — and an output with nothing on any of them is not broken: it stays internal and feeds other functions through wires, which is the normal case for a comparator.
Devices. Each target device object is written in one of two modes:
| Mode | What it does |
|---|---|
| Command | Actuates the object — as if a user operated the widget. Use it to drive real actuators. |
| Set state | Sets the object's state without commanding anything. Use it to publish a computed reading — on a virtual object, or on an object that has no address of its own (the energy registers of a power-only meter, see “Logic Block Reference”). |
The picker offers only objects the port can write (type-compatible and writable); read-only feedback objects are hidden and the dialog says how many. Most objects can honour exactly one mode, so the mode is stated rather than asked; where both fit, you choose.
Actions. A boolean output can also do something besides writing a value — the same things an automation's THEN can do:
| Action | Configuration |
|---|---|
| Trigger a scenario | The scenario — runs exactly as pressing it in the app would. |
| Trigger an automation | The automation — runs its actions, bypassing its own conditions. A disabled automation stays disabled however it is reached (the picker says "— disabled"). |
| Global command | What (Lights in a room, Shutters in a room, Lights in a category, Shutters in a category), To (On, Off, Up, Down, Stop), and a Room or a Category. |
| Send a notification | Title, Message, Recipients (leave empty to notify everyone). |
| Send an e-mail | Subject, Message, Recipients (leave empty to e-mail every user with an address). Requires the Email service (see “Email Service”). |
Two controls turn a value into an event, and both matter:
- Trigger — When it turns on (default), When it turns off or Both ways. An action happens on a transition of the output, never on a repeat of it: a Direct link in every telegram mode re-writes its device targets on every telegram, but fires its actions only when the value actually changes. This is the value-vs-event contract — device targets carry a value, actions are events.
- Not again within — a cooldown in seconds (default 60, minimum 1). Scenarios and global commands write many objects, and each one comes back and re-evaluates the functions bound to it; the cooldown is what stops that becoming a loop. Leave it generous unless you have a reason. A transition dropped by the cooldown is logged as dropped, not silently swallowed.
The Actions tab is available on boolean outputs, and on "any type" outputs (a Direct link) whose wire carries a boolean — the server checks what the port actually carries and reports a mismatch in the validation panel (see “Logic Validation, Monitoring & Safety”). A number has nothing to fire on. Actions appear on the canvas as pills on the output and in the execution history as "fired scenario "Evening"".
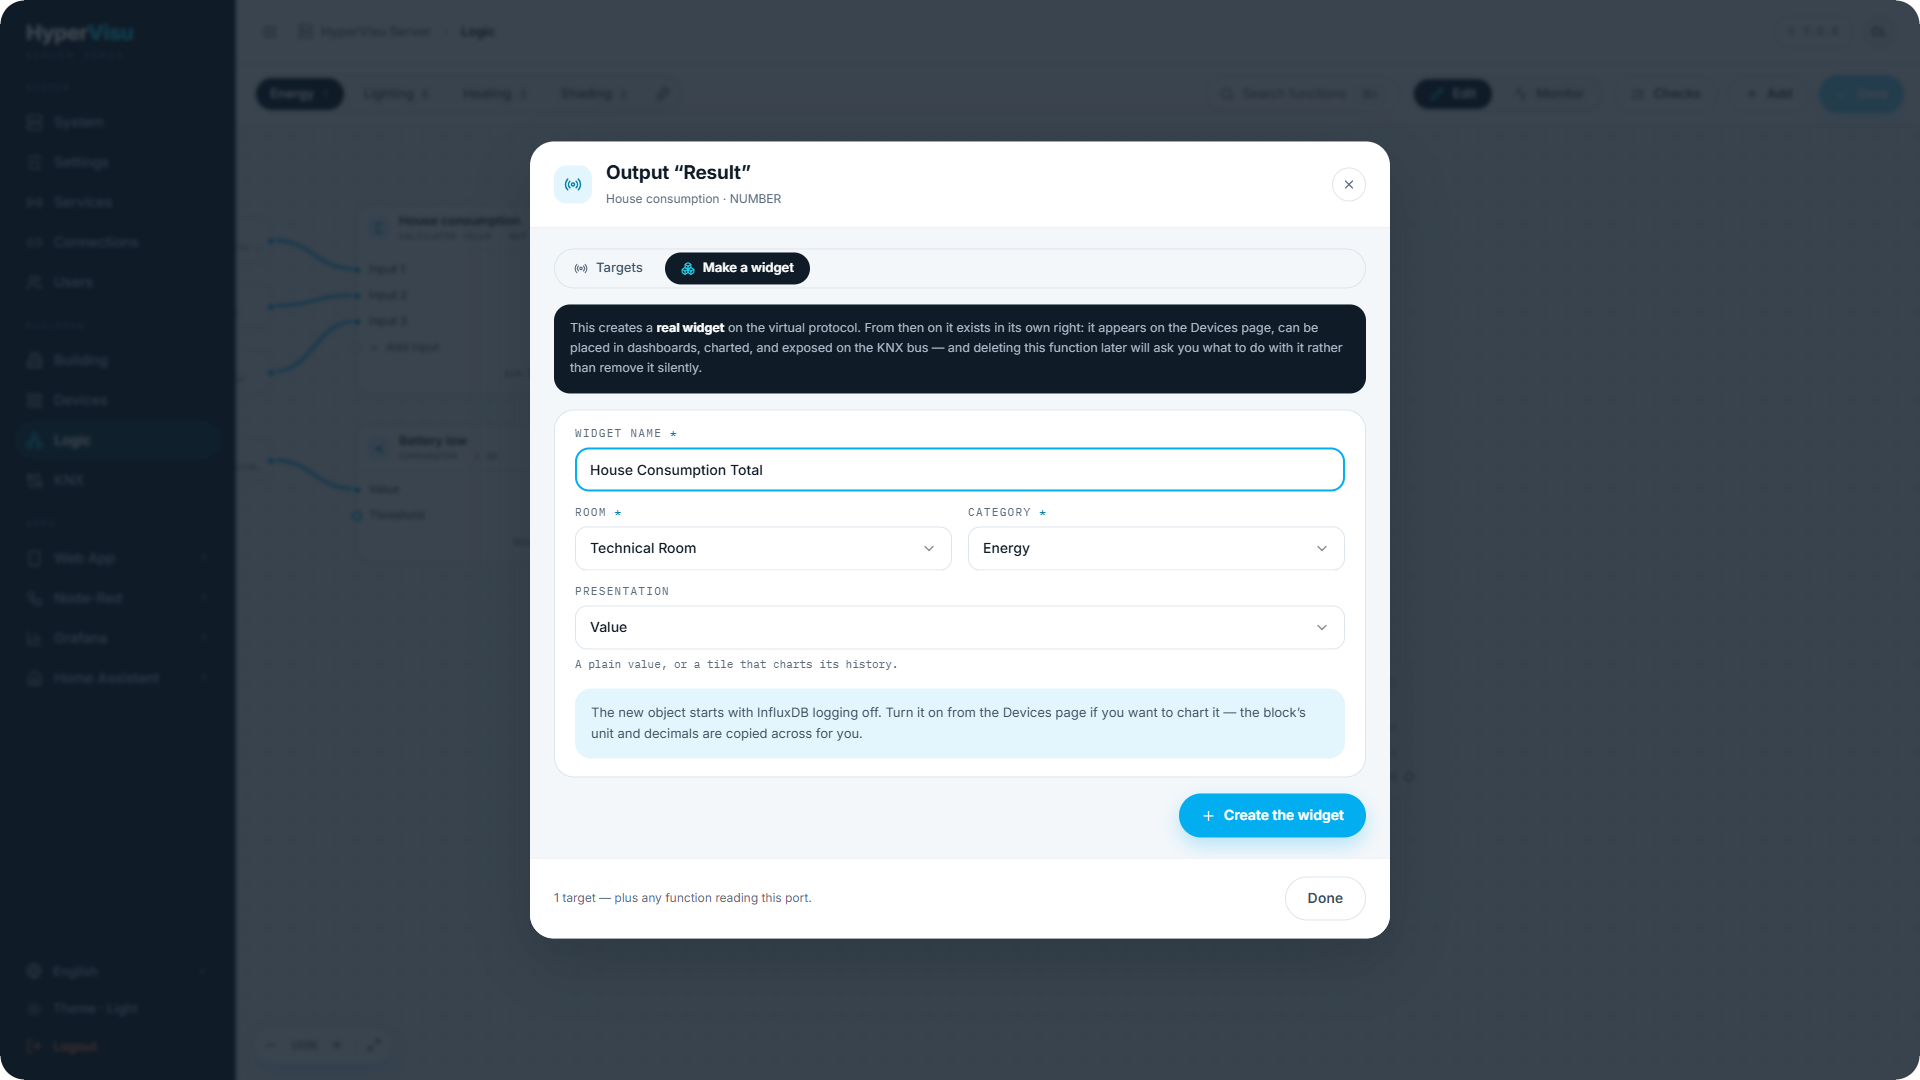
Make a widget. The third tab creates a real device for the value (materializing the output):
- Enter a Widget name, pick a Room and a Category.
- For a numeric output, choose the Presentation — Value (a plain reading) or Trend (a tile that charts its history).
- Click Create the widget. The result is a normal virtual widget: it can be placed on views, bridged to KNX (see “KNX Bridge & Triggers”), logged to history (see “Object Settings, Logging & Notifications”; logging starts off — switch it on from the Devices page, the block's unit and decimals are copied across) — and it outlives the function: deleting the function later asks what to do with it rather than removing it silently.
Example: materialize a Calculated value summing three meters as "Total consumption", category Energy — it immediately behaves like any meter in the app.