
Devices (sidebar group BUILDING) is where every widget in the installation is created and wired. A device (widget) is what the resident sees and controls in the app; behind it sit one or more communication objects — the individual values (switch state, position, temperature, …) that connect to the physical world through a protocol.
What you need: at least one room and one category (see “Building Structure & Categories”), the relevant protocol enabled (see “Services & Protocols”), and a connection for it (see “Connections”). Protocol-specific binding is covered per protocol: KNX (see “KNX Integration”), Home Assistant (see “Home Assistant Integration”), Modbus (see “Modbus TCP Integration”), HTTP (see “HTTP Integration”), MQTT (see “MQTT Integration”), BACnet/IP (see “BACnet/IP Integration”), TCP/UDP (see “TCP/UDP Integration”), Sonos (see “Devices Library & Sonos Binding”).
💡 Tip: Before wiring a device object by object, look for it in the Devices Library (see “Devices Library & Sonos Binding”). For a covered inverter, meter, charger, relay or speaker, the library creates the widgets with every object already bound — an address is all you type.
The Devices workspace
The page has three columns:
- Left rail — browse. Filter the device list by Rooms, Categories, Device Types or Protocols, each with a device count. The rail also offers inline shortcuts: Add Room, Add Category, Add Floor, Add Protocol.
- Center — the device list. Search, filters, and one row per device. The header buttons are Health (opens the Health page, see “Value Transformations & Health”), Categories (manage categories, see “Building Structure & Categories”), Add from library (the Devices Library, see “Devices Library & Sonos Binding”) and Add Device.
- Right rail — binding. When the selected protocol is KNX or Home Assistant, the right rail shows the source material to bind from: the KNX group-address tree (see “KNX Integration”) or the Home Assistant entities (see “Home Assistant Integration”).
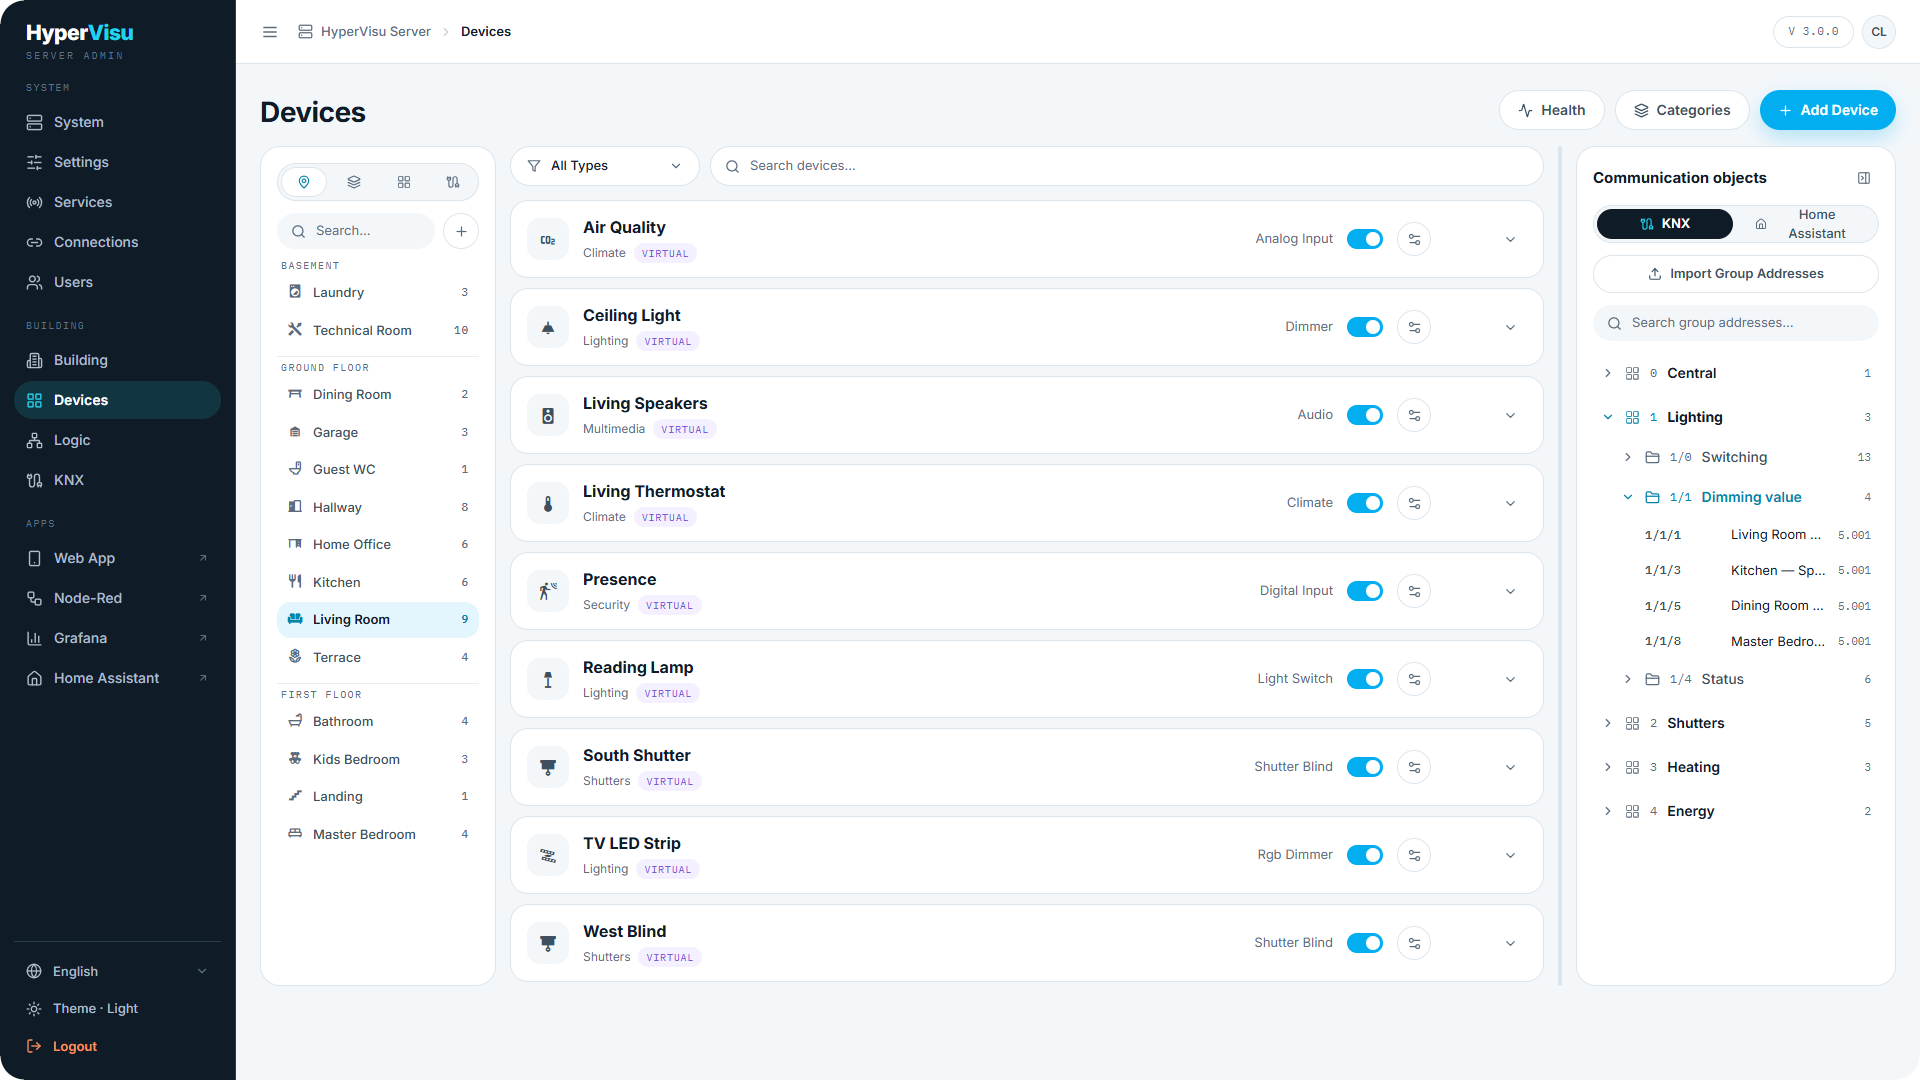
Per device row you can:
- Rename the device and change its icon.
- Toggle Visible in the app — hide a device without deleting it (useful for devices that only feed logic or logging).
- Show objects — expand the row to reveal the device's communication objects.
- Delete the device (with confirmation; this cannot be undone).
Row badges summarize each device's configuration at a glance:
| Badge | Meaning |
|---|---|
| LOGGED | At least one object logs its history to InfluxDB (see “Object Settings, Logging & Notifications”). |
| GRAFANA | A logged object — the Grafana panel builder is available for it (see “Object Settings, Logging & Notifications”). |
| TRANSFORMS | At least one object has a transformation chain (see “Value Transformations & Health”). |
| SETTINGS | An object carries non-default settings. |
| PIN SET / NO PIN | On alarm devices: whether a PIN protects its commands (see “Alarm PIN & Global-Command Exclusions”). |
| NO GLOBAL | The device is excluded from global commands (see “Alarm PIN & Global-Command Exclusions”). |
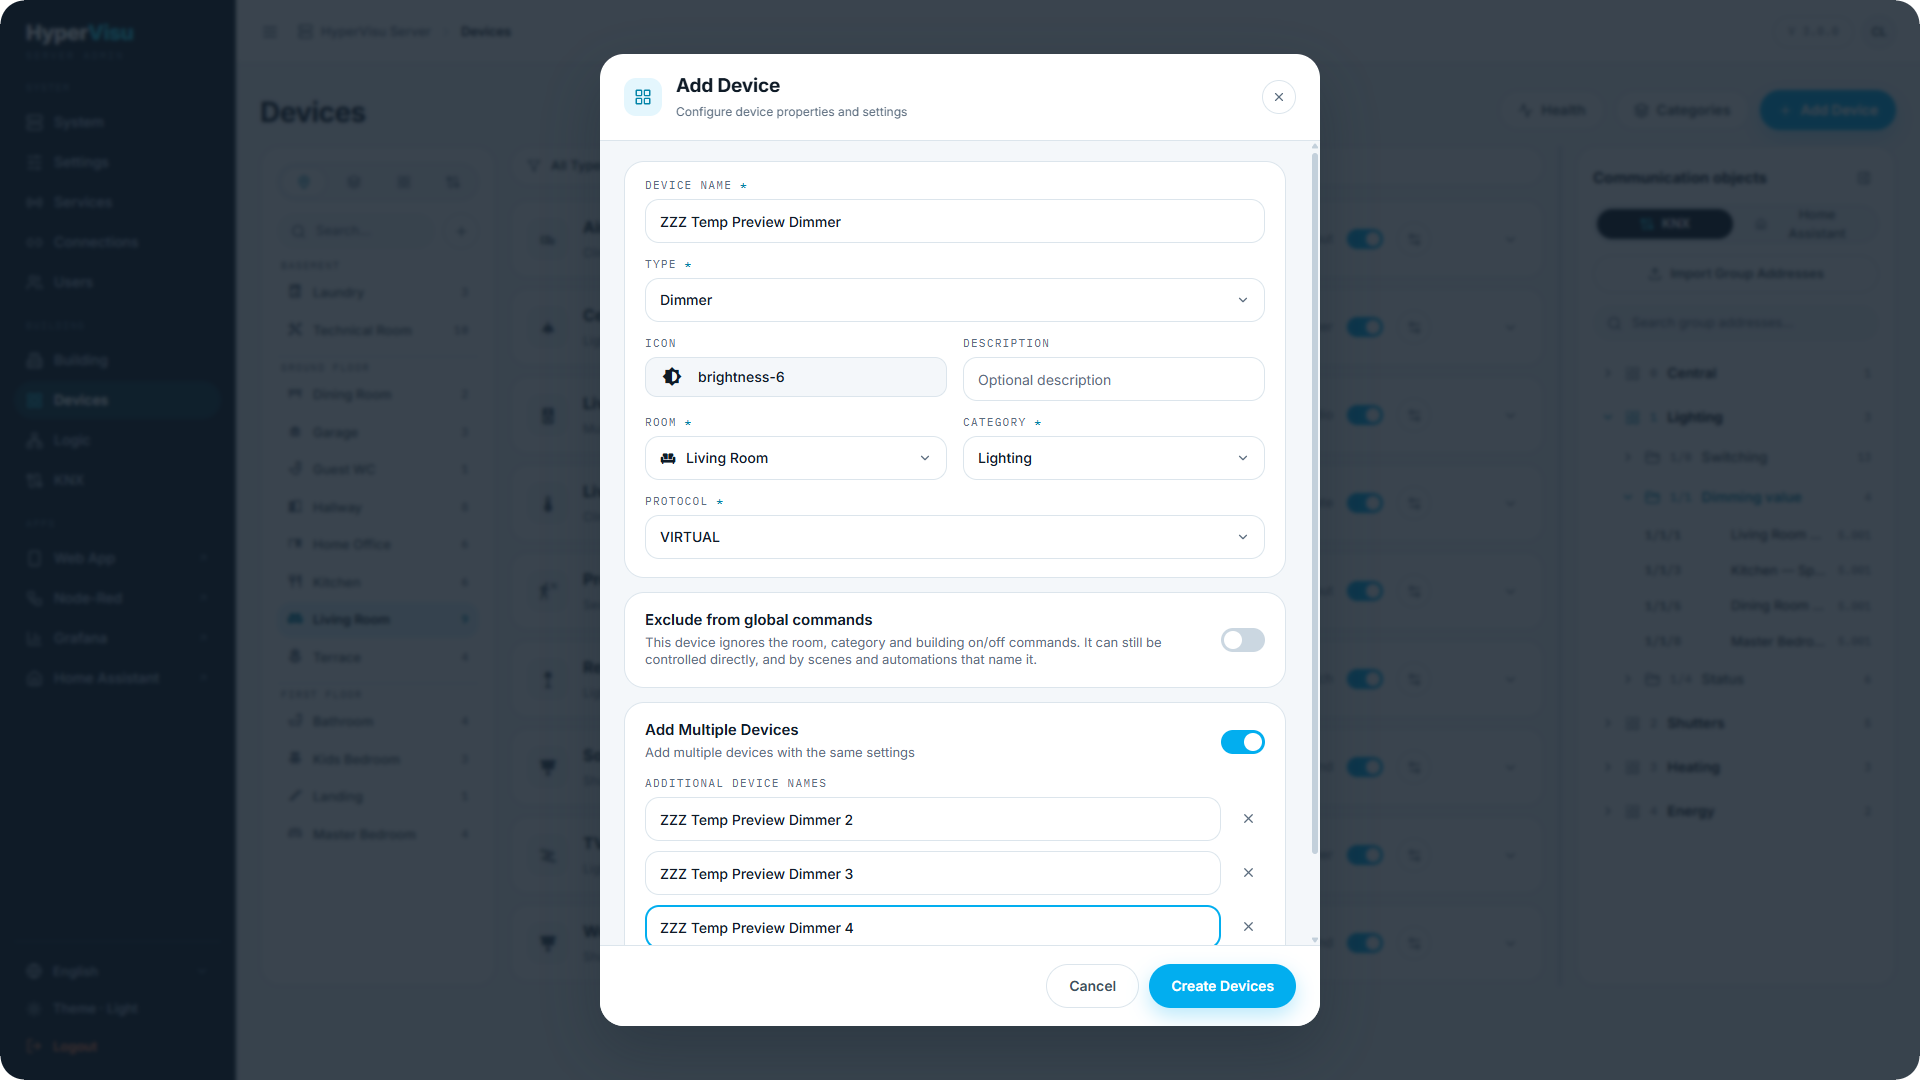
Adding a device
- Click Add Device.
- Enter the Device Name, pick an Icon, and optionally a Description.
- Pick the Protocol — this is the connection the device uses (see “Connections”).
- Pick the Room and Category.
- Pick the widget Type and, where offered, the Subtype.
- Click Create Device.
To create several similar devices at once, turn on Add Multiple Devices: enter a list of additional device names, and one device per name is created with the same settings. The button becomes Create Devices.
Widget types & sub-types
The widget Type decides everything about a device: which controls the app shows, and which communication objects exist. Objects are created automatically from the device type — you never add objects by hand. Many types offer a Subtype that varies the control set (for example a shutter with or without slats).
Each object has:
- a direction — whether the value flows in (from the device to HyperVisu), out (commands to the device), or both;
- a data type — boolean, number, text, and so on.
Choose the type that matches the physical function, not the protocol: a KNX-driven light and a Home Assistant light both use the same light widget type. The complete catalog of types, sub-types and their objects is in the widget type reference (see “Widget Types Overview”).