
Network Configuration
By default, the IP address of the KNX gateway is set to 192.168.1.51.
Using a laptop connected to the gateway, open a web browser and navigate to the IP address of the gateway. Set a fixed IP address of your choice, do not use DHCP mode.
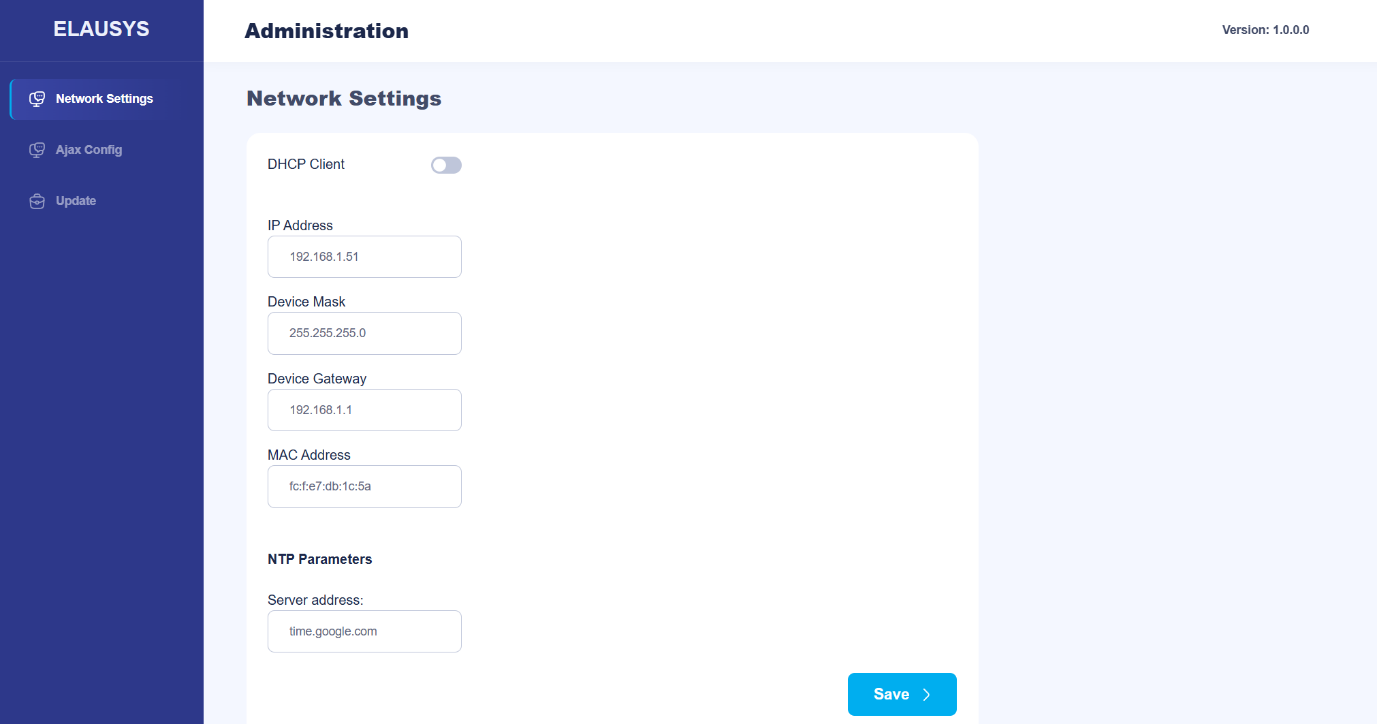
Note: Ensure your computer is on the same subnet as the gateway. If you are using DHCP and the network ranges differ, temporarily assign your computer a static IP in the 192.168.1.x range to access the gateway. Once the gateway's IP address has been updated, you may revert your computer to its original network settings.
Ajax Settings
- The Ajax Settings must be set on the Ajax Config page.
- The hub ID is made of 8 characters and can be found at the bottom of Hub status, below the version.
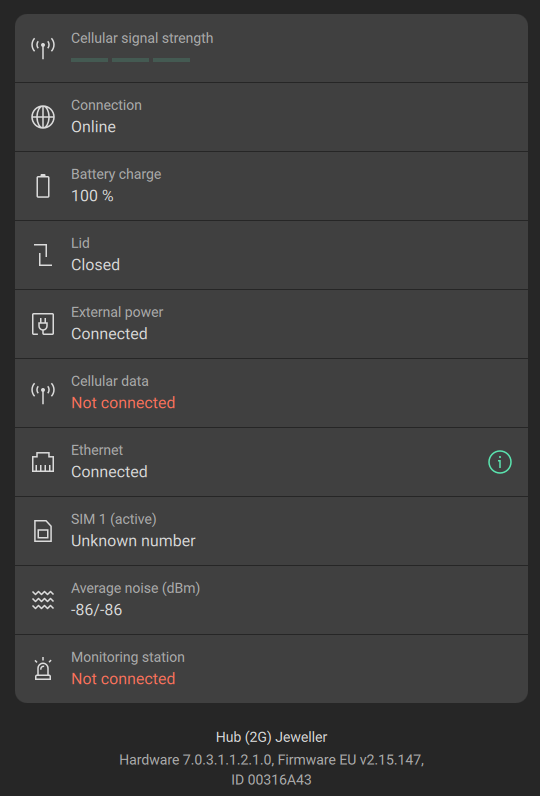
Note: If you only need zone monitoring and status feedback (one-way communication), this step is optional.
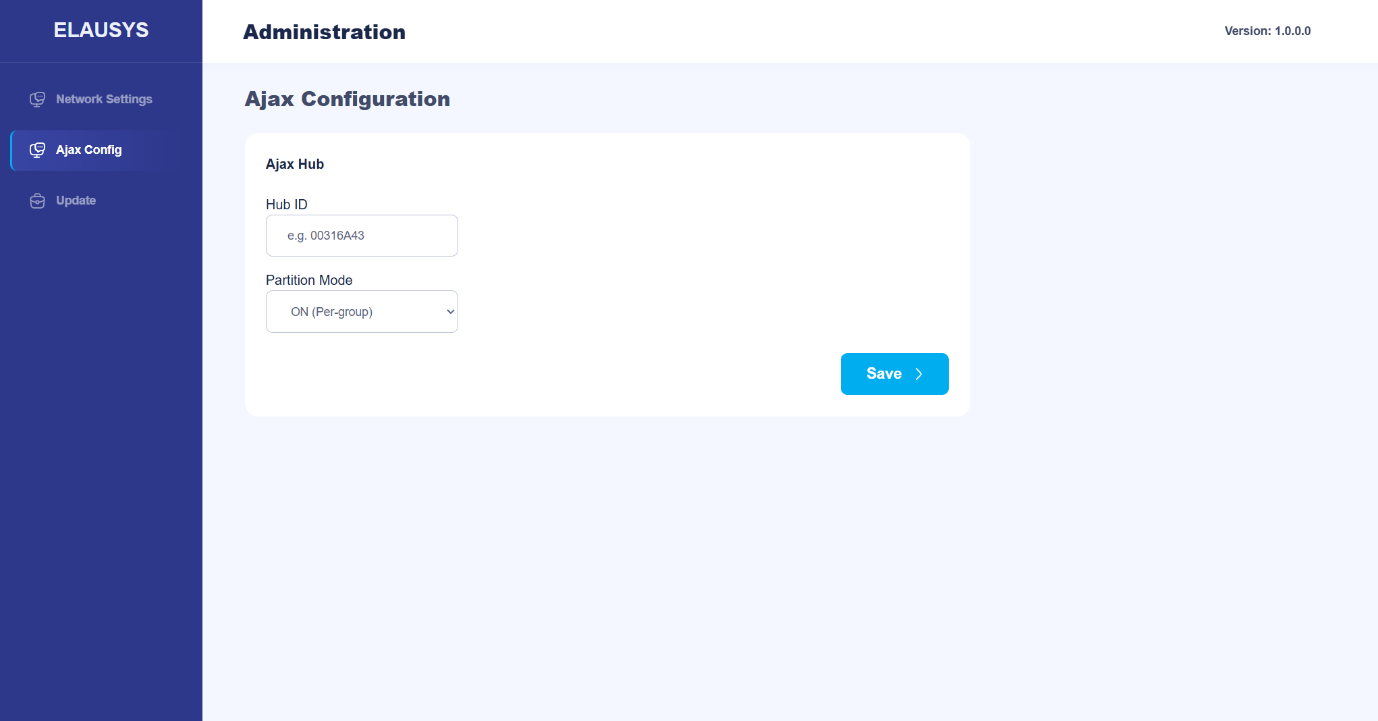
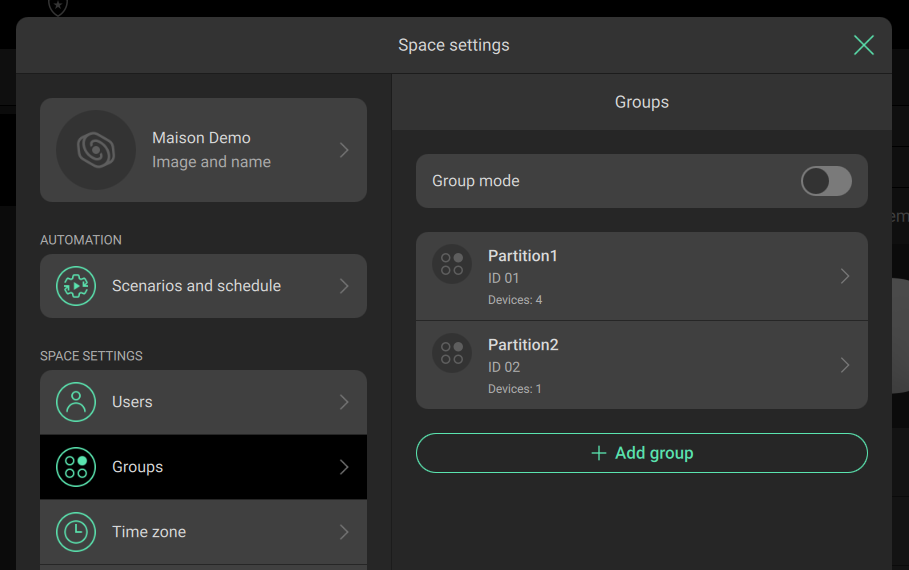
- The partition Mode should match the AJAX Group mode from the Space settings :
ETS Application
Elausys devices are configured using the ETS tool. You should first download and install ETS before you continue.
The AJAX gateway uses the NXG-KNX Interface application program. It must be assigned a physical address on the KNX network. Assign a free address to the module to enable downloading the application program to the device.
ETS Parameters
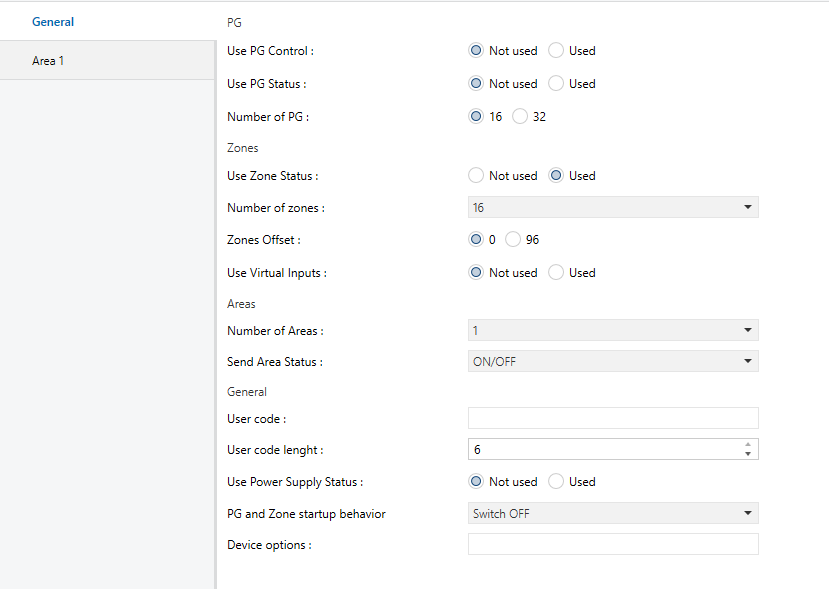
Once a KNX physical address is set, open the “Parameters” tab to configure the interface. The parameters are grouped into sections: a General section and a section for each area configured.
General Settings
- Set the Number of zones to match the zones you want to monitor (up to 96).
- Set the Number of areas according to your AJAX configuration
- Enable Power supply status if you want AC failure and battery failure monitoring on KNX.
- Ensure PG Control, PG Status, and Virtual inputs are all set to “Not used”.
Area Configuration
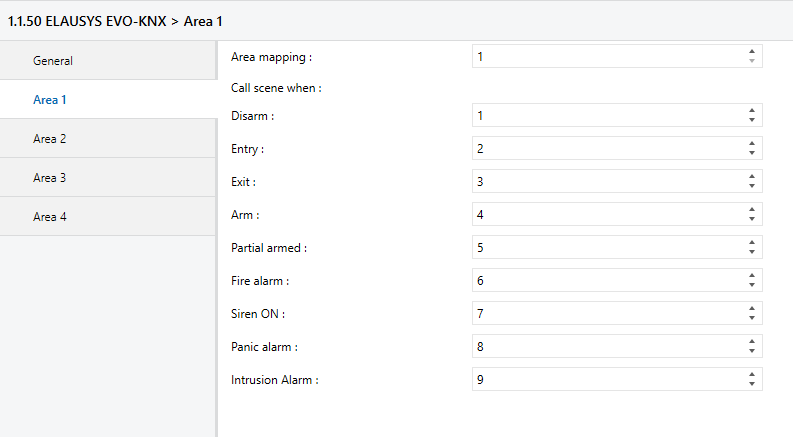
For each area, a tab is available in the left side menu:
- Open the first area parameters by selecting “Area 1”.
- By default, Area 1 is mapped to group 1 of the alarm system. Change the Area mapping value if needed (e.g., set to 5 to link Area 1 of the KNX interface to group 5 in the alarm system).
- For each status of the area, set the scene number to be recalled (0–64). Leaving the scene number at 0 disables scene control for that status.
- Repeat for each area in your project.
Group Objects
Open the “Group Objects” tab of the device and assign a group address (GA) to each group object (GO) needed by the application. Assign group addresses to:
- Scene object (GO 233) — for automatic KNX scene recall
- Zone status objects (GO 67+) — for each zone you want to monitor on KNX
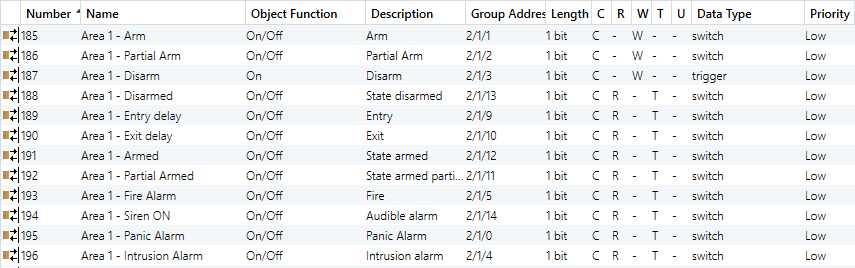
- Area control objects (GO 185–187 per area) — for arm/partial arm/disarm commands
- Area status objects (GO 188–196 per area) — for status feedbacks to KNX visualisation
- Power supply objects (GO 163–164) — for AC failure and battery failure monitoring
- Module status (GO 1) — for gateway health monitoring
Example for Area 1:
Power supply status:

Download
When all group objects and parameters are configured, download the KNX Interface application to the device. The first download requires pressing the programming button on the device to enter KNX programming mode, then performing a full download.
Verification and Commissioning
After downloading the application, verify the gateway operation:
- Check the front panel LEDs: Network LED confirms Ethernet connectivity; Connected LED confirms active communication with the AJAX Hub.
- Test zone triggers from the AJAX system and verify that the corresponding KNX group objects update correctly.
- Test area commands from ETS or your KNX visualization (arm, partial arm, disarm) and verify that the AJAX system responds.
- Verify scene recall by changing area statuses and confirming the expected KNX scenes are activated.