
Connections (sidebar group SYSTEM) manages the configured links between the server and the outside world. A connection is one configured link — one KNX interface, one Home Assistant server, one Modbus device, one HTTP endpoint, one MQTT broker, one BACnet device, one TCP/UDP device. Devices are then attached to a connection (see “The Devices Workspace”).
How many connections a protocol takes:
- KNX, Home Assistant and Virtual — exactly one connection each.
- Modbus TCP, HTTP, MQTT, BACnet/IP and TCP/UDP — as many as you need: one per physical device or endpoint (one per broker for MQTT).
What you need: the protocol enabled on the Services page (see “Services & Protocols”). A connection defined for a disabled protocol shows Enable <protocol> in Services instead of a live status.
The connections list
The list shows every connection with a live status.
For each connection you can:
- Search by name, host or device.
- Enable/disable the individual connection.
- Test — runs a live connection test and reports Connection succeeded or Connection failed. The button is offered for KNX, Home Assistant, MQTT, TCP/UDP, BACnet/IP and Sonos.
- Duplicate — copies the connection (named "(copy)"); useful for a second Modbus or TCP/UDP device with similar settings.
- Delete — a warning states how many devices lose their source: the devices are kept and marked unreachable, not removed.
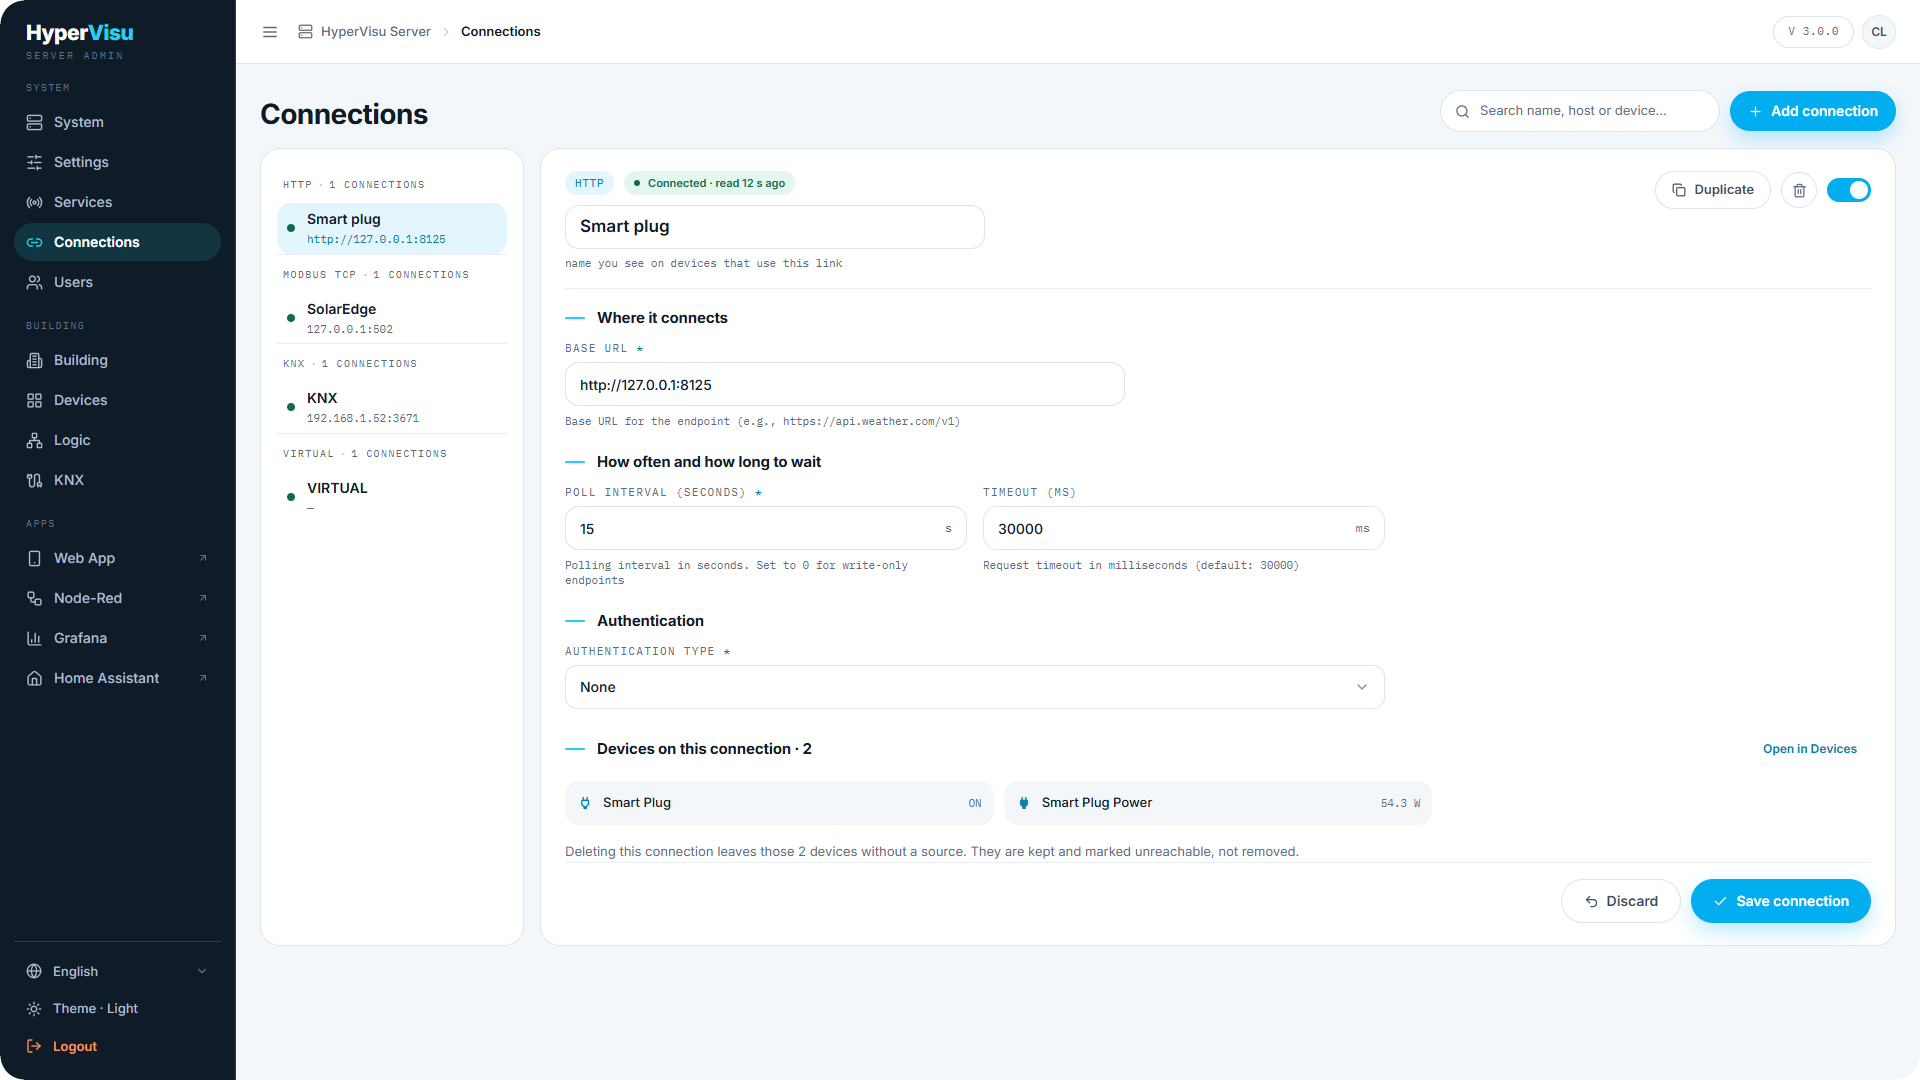
Selecting a connection opens its detail panel:
- Where it connects — the protocol-specific address settings.
- How often and how long to wait — poll interval and timeout, where the protocol uses them.
- Devices on this connection — the devices using this link, with an Open in Devices shortcut.
Adding a connection
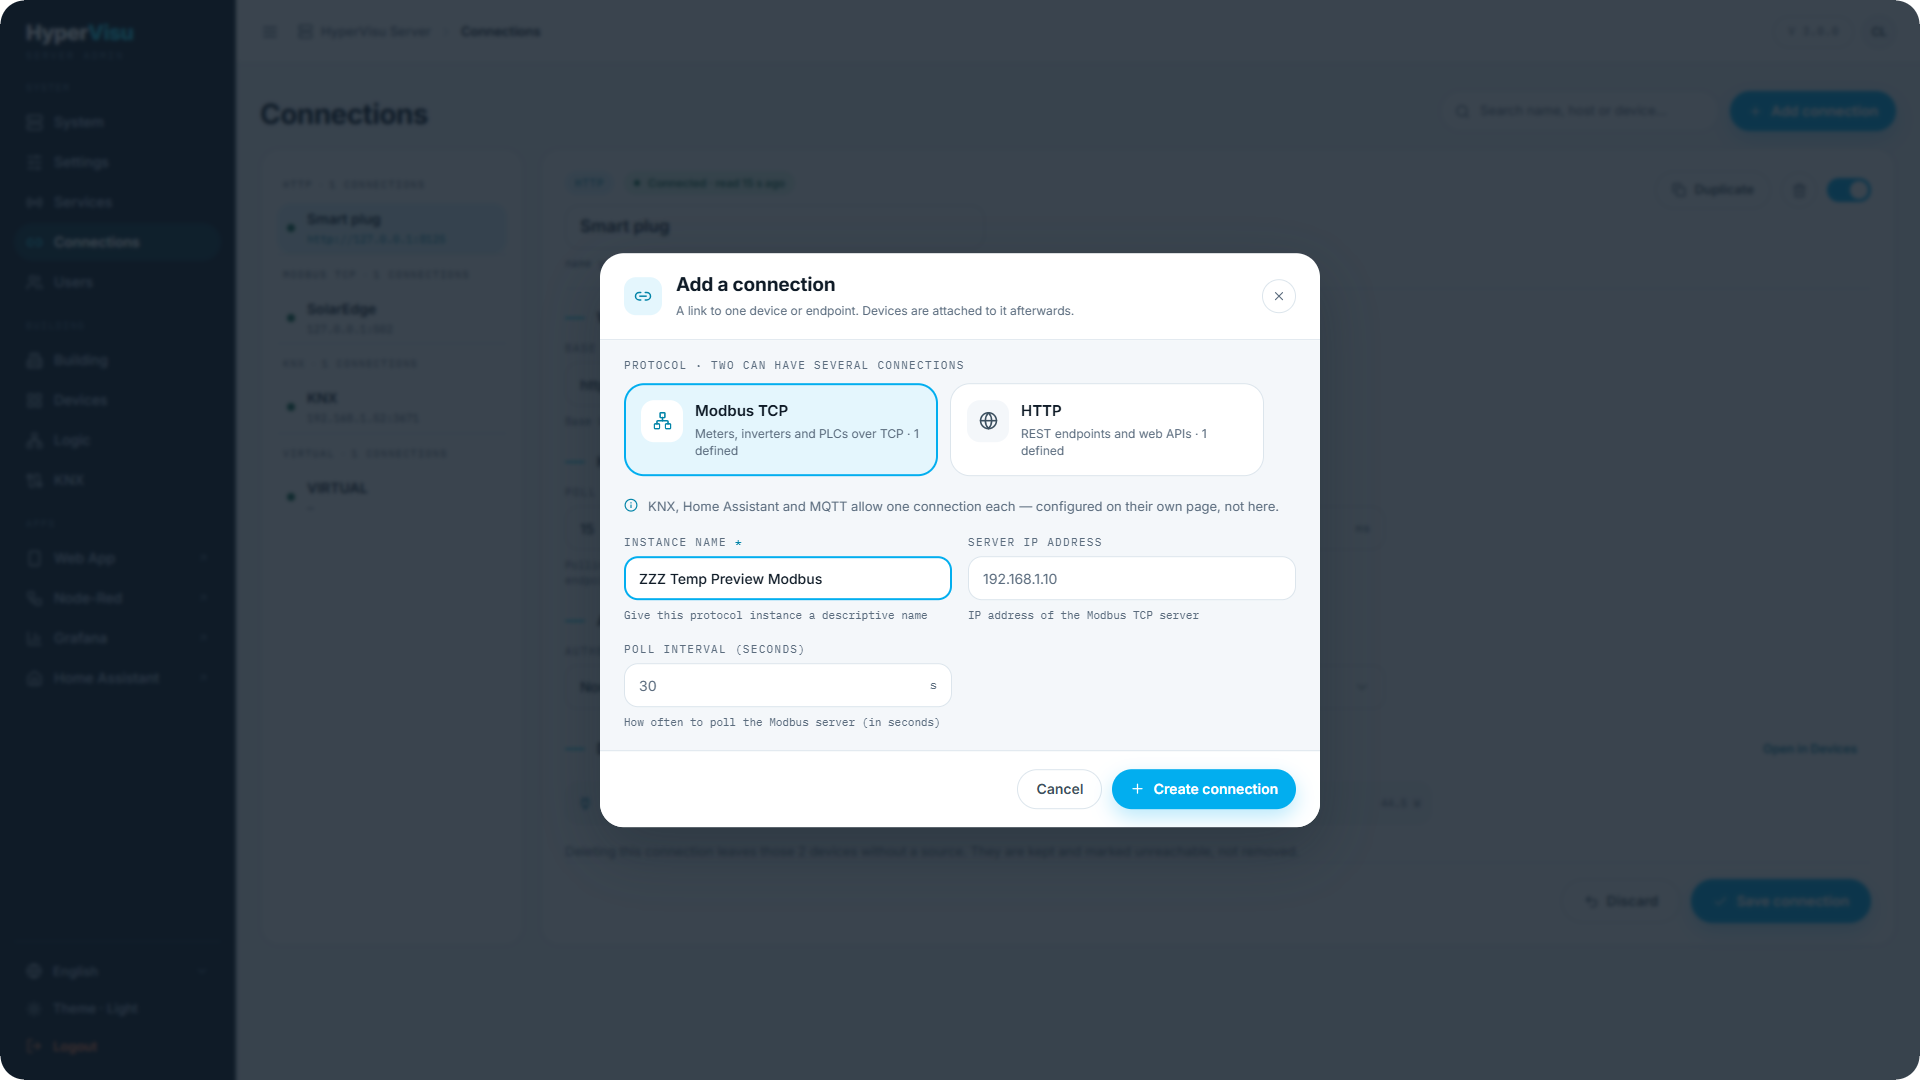
- Click Add connection.
- Pick the protocol first. The dialog then shows only that protocol's fields.
- Give the connection a name — this is the name you see on devices that use the link.
- Fill in the protocol fields and click Create connection.
Per-protocol settings
KNX
| Field | Description |
|---|---|
| IP Address / Port | The KNX/IP interface or router on your LAN. |
| Individual Address | The physical address HyperVisu uses on the bus. |
| Communication Protocol | Tunnel UDP (point-to-point to an interface) or Multicast (routing). |
| Bus Date/Time | Optional: the server broadcasts the current date and time to the bus on a group address, every send cycle seconds. |
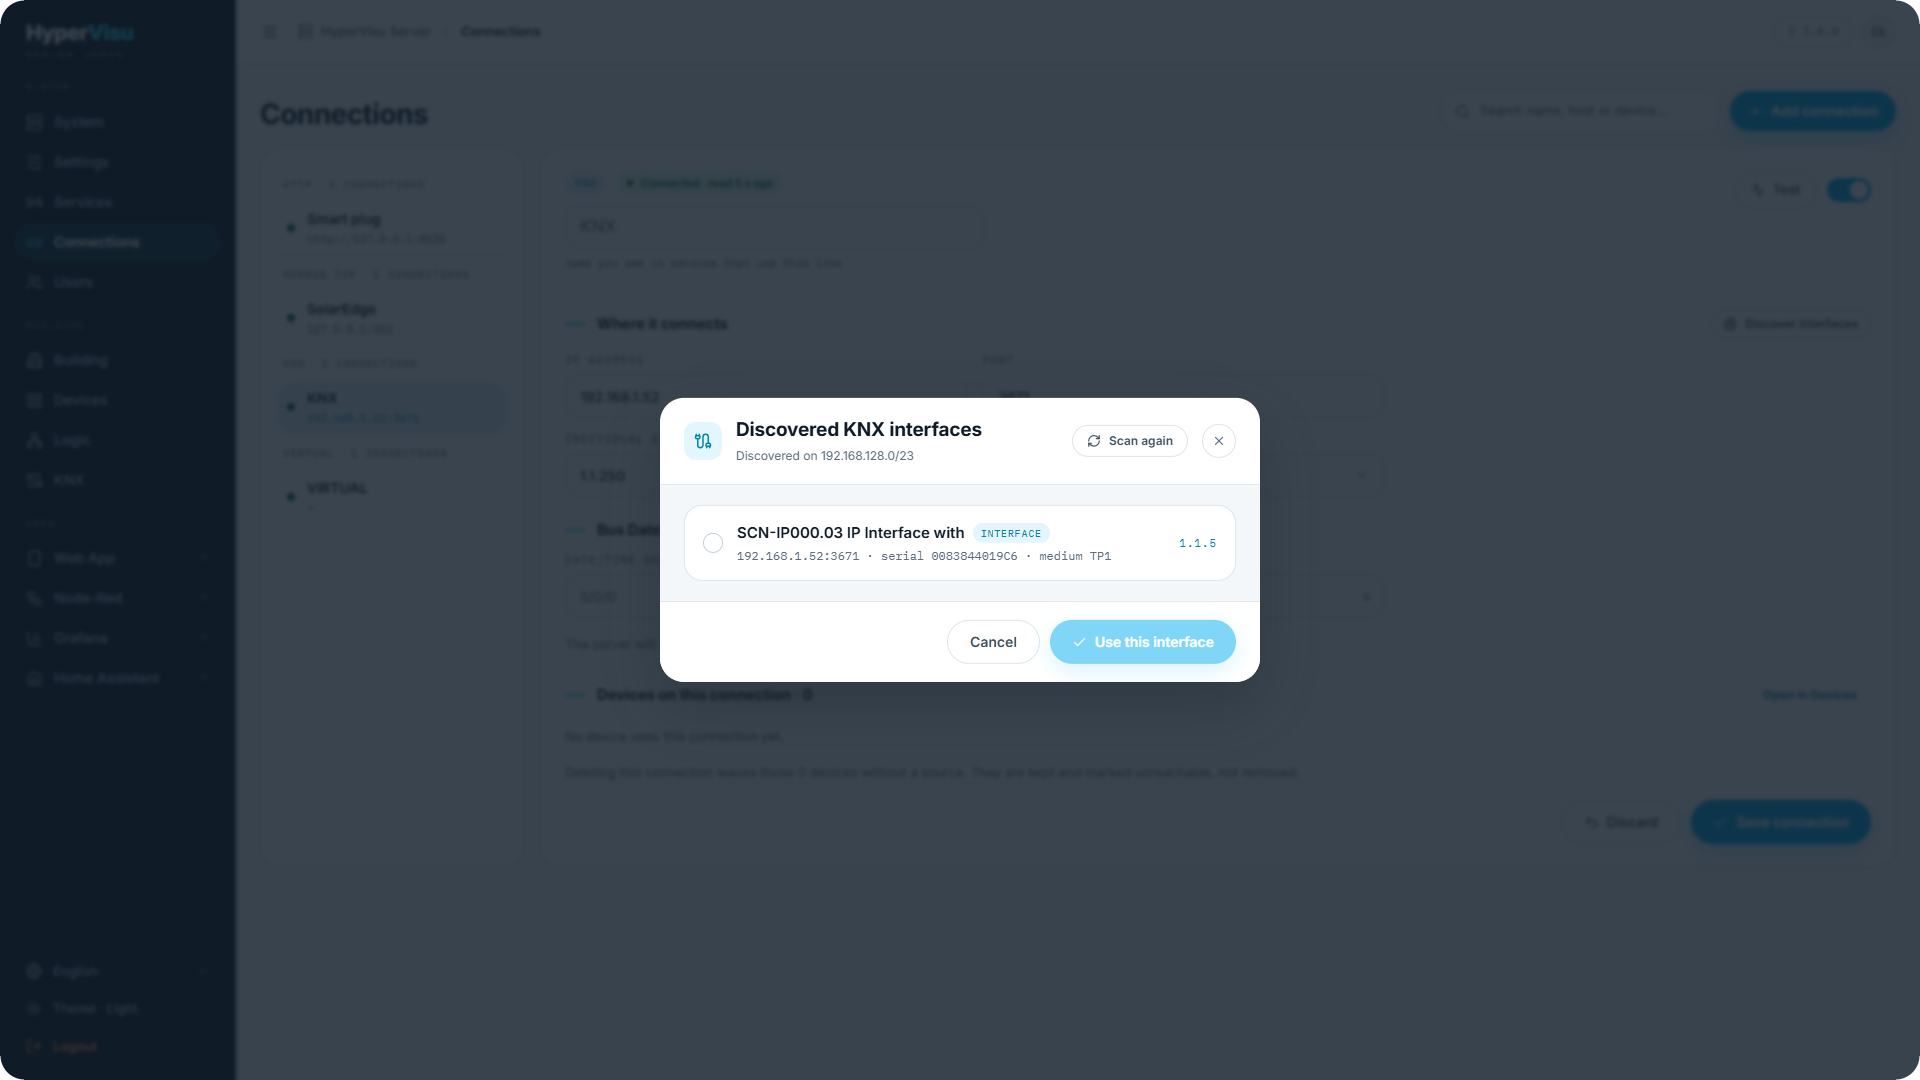
Click Discover interfaces to scan the network for KNX/IP interfaces. Pick one from the results and its settings fill the connection fields.
Home Assistant
| Field | Description |
|---|---|
| Home Assistant URL | Full URL including http:// or https:// and the port. |
| API Token | A long-lived access token, generated in Home Assistant's user settings. |
Modbus TCP
| Field | Description |
|---|---|
| Server IP Address | The Modbus TCP device. |
| Port | Default 502. |
| Poll Interval | How often the server reads the registers, in seconds. |
HTTP
| Field | Description |
|---|---|
| Display Name | A friendly name for the endpoint. |
| Base URL | e.g. https://api.example.com/v1. Object paths are appended to it (see “HTTP Integration”). |
| Port | Optional; usually derived from the URL. |
| Poll Interval | Seconds between polls. Set 0 for a write-only endpoint. |
| Timeout | Request timeout in milliseconds. |
| Authentication | None, API Key (Header), API Key (Query Parameter), Basic Authentication, Bearer Token, or Custom Headers (sent with every request). |
MQTT
| Field | Description |
|---|---|
| Broker address | Host, or a full URL (mqtt://, mqtts://, ws://, wss://); a plain host means mqtt://. |
| Port | Default 1883 (8883 for mqtts://). |
| Username / Password / Client ID | Credentials if the broker requires them; leave the client ID empty to derive one from the server's MAC address. |
| Accept self-signed certificates / CA certificate | TLS only (mqtts:// / wss://): off by default; paste the signing authority's PEM certificate when it is not a public one. |
| Broker options | Keepalive (60 s), Default QoS (0/1/2), Availability topic (hypervisu/status) with Announce HyperVisu availability, Clean session. |
Test connects to the broker and waits for its acknowledgement — also available in the add-connection dialog before the connection exists (see “MQTT Integration”).
When the built-in broker is running and nothing is connected to it yet, the Connections page offers a shortcut instead: a panel titled The local MQTT broker is running with a Use the local broker button, which creates the connection with the account HyperVisu manages itself — no address or password to type (see “The Built-in MQTT Broker”).
BACnet/IP
| Field | Description |
|---|---|
| Device address | IP address of the BACnet device, or of the router in front of it. |
| Port | The UDP port the device listens on (standard 47808). |
| Device instance | The device object instance (0–4194302); optional, checked by the test when set. |
| COV subscription lifetime | Seconds before a change-of-value subscription is renewed; empty = service default (600 s). |
| Poll Interval (seconds) | How often points without a COV subscription are re-read (default 30). |
Click Scan network to broadcast a Who-Is and pick the device from the answers — address, port and instance are filled in (see “BACnet/IP Integration”).
TCP/UDP
| Field | Description |
|---|---|
| Device address / Port | The device (AUDAC XMP44: port 5001). |
| Poll Interval (seconds) | How often to re-read the device; 0 for a device that pushes its state on its own. |
| Framing and timing | Transport (TCP · persistent connection / UDP · datagrams), Frame delimiter (\r\n), Payload encoding (ASCII text / HEX bytes), Listen port (UDP), Heartbeat frame • Every (TCP), Connect timeout, Delay between commands, Read everything on connect. |
The frames themselves are configured per object (see “TCP/UDP Integration”).
Virtual
Nothing to configure — virtual devices live entirely on the server (see “Virtual Devices & Node-RED”).