
Modbus TCP integration
Modbus TCP connects HyperVisu to industrial and energy equipment: solar inverters, EV chargers, heat pumps, ventilation units, PLCs. HyperVisu is the Modbus client — it polls the equipment's registers and writes to them when you control a widget.
What you need: the device's IP address, Modbus port (usually 502), its register map (from the manufacturer's Modbus documentation), and its slave/unit ID.
Connections. Switch on Modbus TCP Protocol on the Services page first (see “Services & Protocols”); it is off on a new server. Modbus TCP is a multi-connection protocol: create one connection per Modbus server (per IP/port) on the Connections page (see “Connections”). In Add connection, select the Modbus TCP card and enter an Instance Name, the Server IP Address and a Poll Interval (seconds) — how often HyperVisu reads all objects on that connection. Type the interval: the grey 30 is only a hint, and a field left empty makes the server poll every 5 seconds.
The dialog has no port field: the connection is created on port 502. If the equipment listens on another port, select the new connection, change Modbus TCP Port and click Save connection.
A Modbus connection has no Test button. The status Connected on the Connections page and the live value of a bound object are the check.
Binding an object. Bind Modbus registers to widget objects in the Devices workspace. Per object you set:
| Setting | Meaning |
|---|---|
| Slave ID | The unit identifier, 1–247. |
| Register type | Coil, discrete input, input register or holding register. |
| Register address | The register address from the device's register map, from 0 to 65535. It is sent to the equipment exactly as typed: enter the protocol address, not a 4xxxx or 3xxxx reference number. Watch for off-by-one: some vendors document addresses starting at 1, Modbus counts from 0. |
| Data type | How the raw registers are decoded (16/32-bit integer signed/unsigned, float, …). |
| Byte order | The word/byte order for multi-register values — the vendor documentation states it. The field appears only for data types that span two or more registers (32-bit, 64-bit and floating point). |
| Write Function | Holding registers only. Leave it on Automatic (FC6 / FC16) unless the equipment does not implement FC6; then choose Always FC16 (write multiple). |
| Scaling | Scale, Offset, Decimal Places and Units. The Formula line shows Display = (Raw × scale) + offset with a fixed sample raw value, not the equipment's reading. A scale of 0 is read as 1. |
📘 Note: The object's scale and offset run before any transformation on the same object (see “Value Transformations & Health”). Do not add a scaling transformation on top of them, or the value is scaled twice.
Worked example — inverter power into a meter
The inverter's documentation says: active power, input register 32080, signed 32-bit integer, gain 1, unit W, unit ID 1.
- Create a Modbus TCP connection for the inverter: Server IP Address
192.168.1.120, Poll Interval (seconds)10(see “Connections”). The connection is created on port502. - In Devices, add a Meter widget "Solar production", room Technical, category Energy. Under Protocol, select the inverter's connection, listed by the name you gave it.
- Open its power object and enter: Slave ID
1, Register type Input register, Register address32080, Data type INT32, Byte order as documented. - Set Scaling: scale
0.001, offset0, decimals2, unitskW. A raw value of5230becomes5.23 kW. - Click Save object, then click Apply changes in the sidebar and confirm. The connection, the device and its objects go live together at that moment.
- Wait at least one poll interval. The live value appears on the widget row; check it against the inverter's own display.
💡 Tip: Enable logging on the object (see “Object Settings, Logging & Notifications”) so the meter gets charts and history in the app.
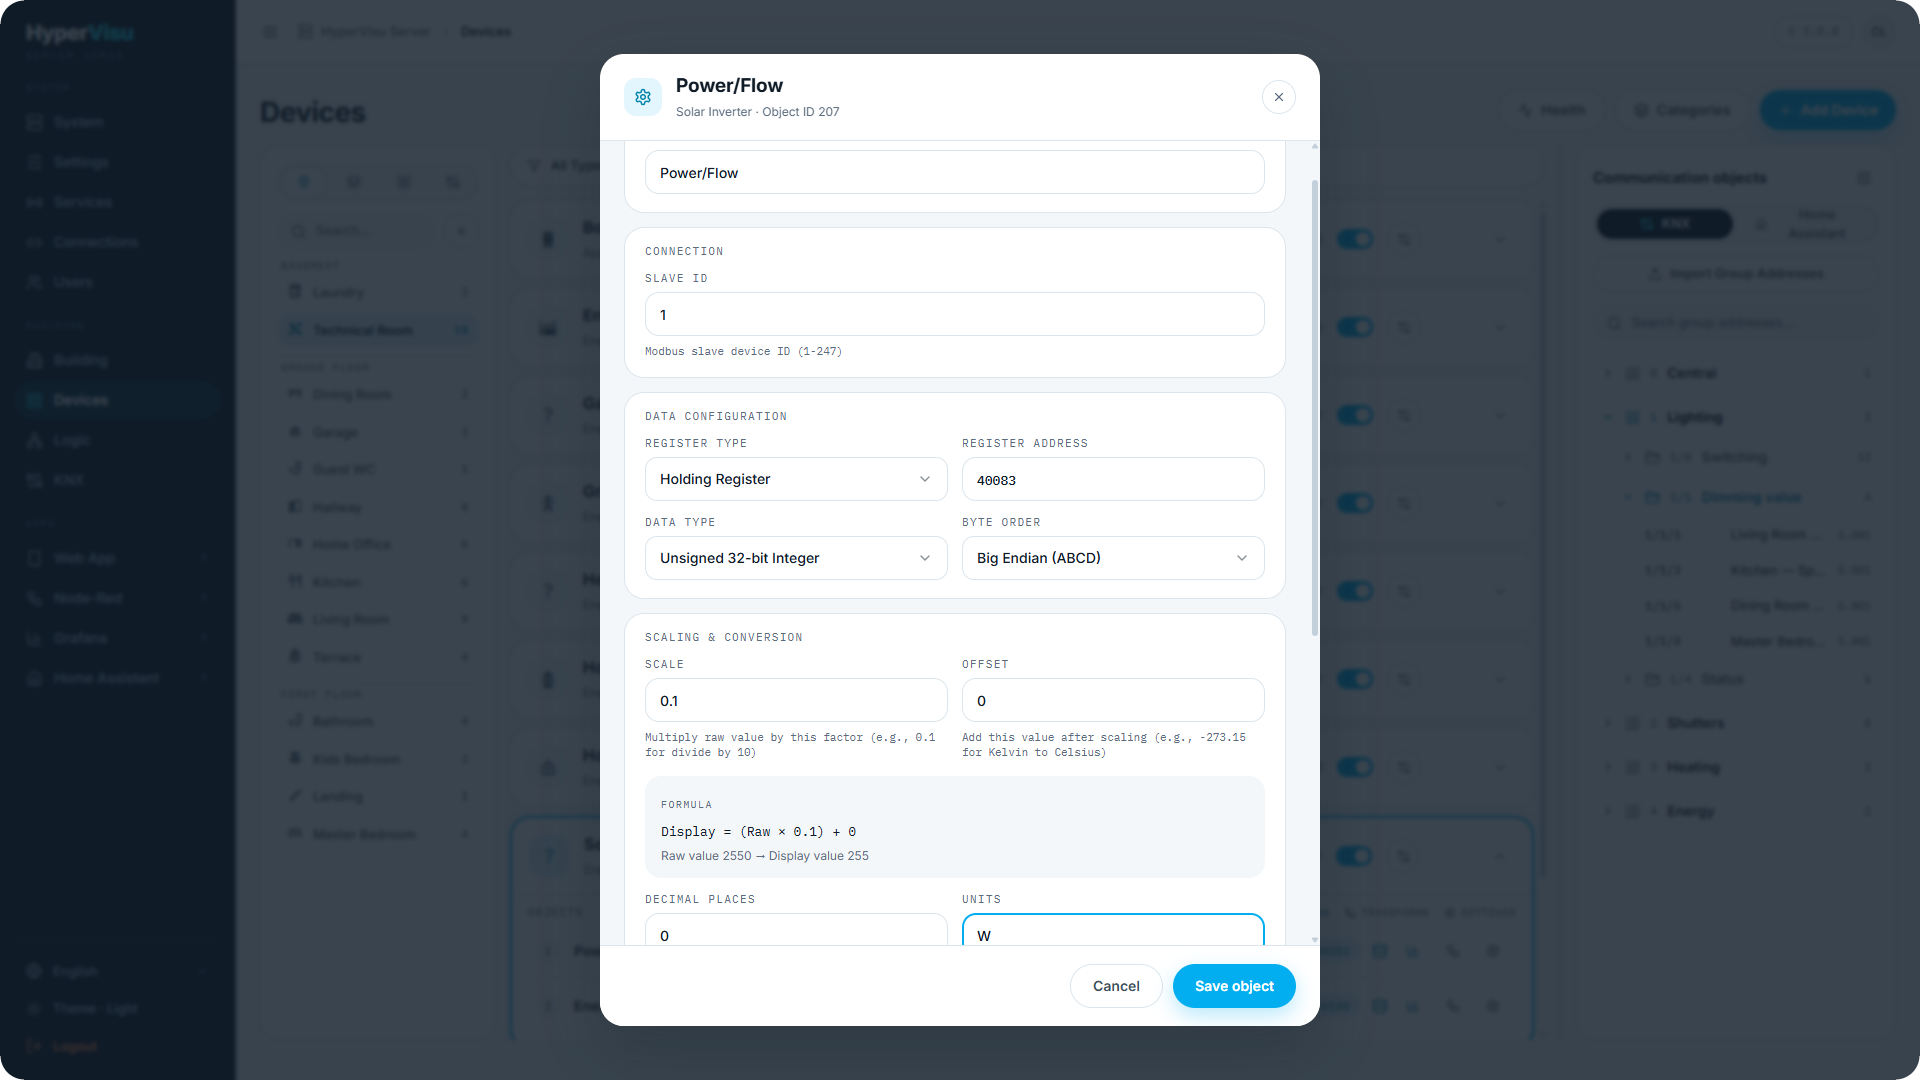
Binding Modbus
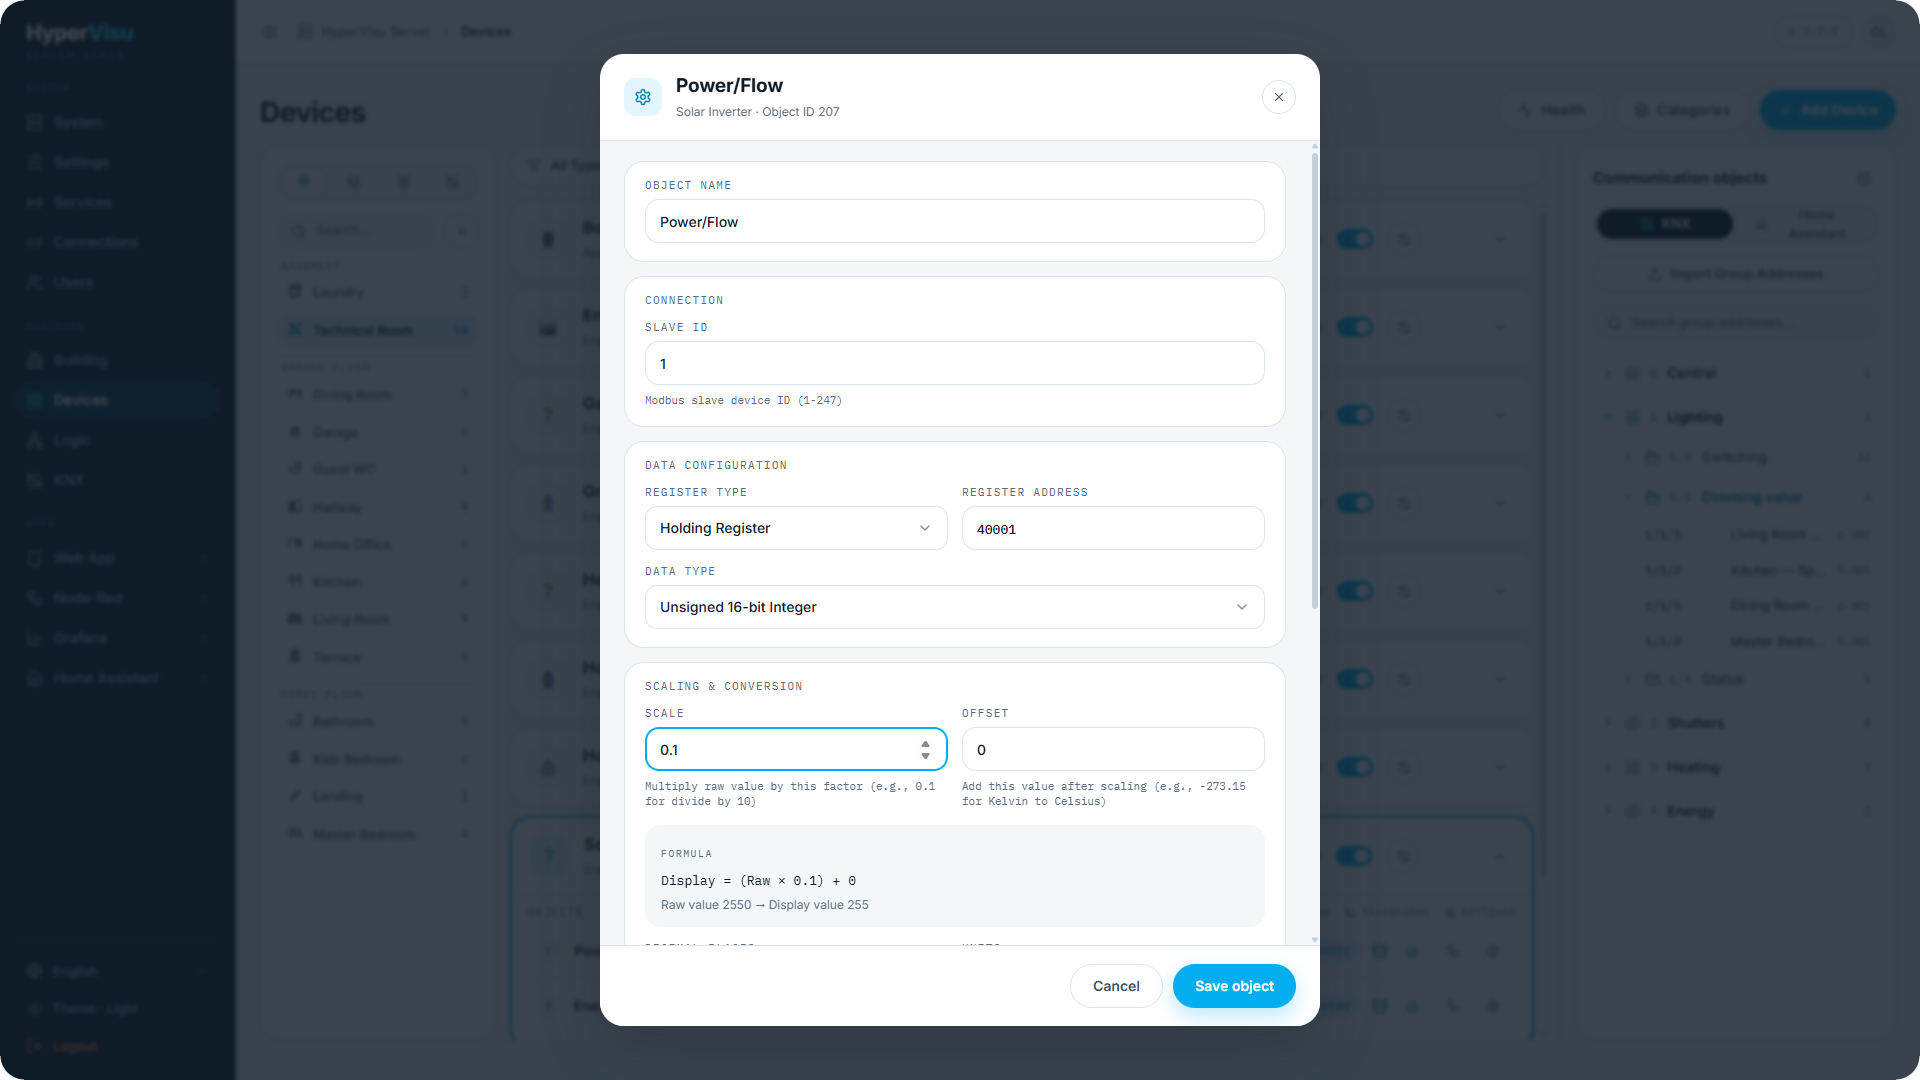
Modbus objects are configured in the object settings dialog (open the object with Edit, see “Object Settings, Logging & Notifications”). The Modbus sections are:
Connection
| Field | Description |
|---|---|
| Slave ID | The Modbus slave device ID (1–247). |
Data Configuration
| Field | Description |
|---|---|
| Register Type | Which register table to read or write (e.g. holding or input registers). |
| Register Address | The register number. |
| Data Type | How the register bytes are interpreted (integer sizes, float, …). |
| Byte Order | The word/byte order used by the device. |
Scaling & Conversion
| Field | Description |
|---|---|
| Scale | Multiply the raw value by this factor (e.g. 0.1 to divide by 10). |
| Offset | Added after scaling (e.g. -273.15 for Kelvin → Celsius). |
| Decimal Places / Units | Display precision and unit. |
The dialog shows the live formula — Display = (Raw × scale) + offset — with a worked example, so you can check the conversion before saving.
💡 Tip: Register numbers, function codes and a full worked example are in the Modbus chapter.